
Composting is a great way to recycle and build a beautiful lush garden. If you are new to composting, I’ve made a basic guide for you.
In this article, discover:
[lwptoc skipHeadingLevel=”h1,h5″]
I. What is Composting?
Composting is a natural process. It recycles various organic materials(such as food scraps or green garden waste) otherwise regarded as waste products and produces a rich black soil known as ‘humus’ or ‘Black Gold.’
II. The Benefits of Composting
Compost is rich in nutrients and used to grow healthy plants. Gardeners have been using compost to boost the health of their vegetable garden, flower beds, shrubs, and lawns. Also, composting is a sustainable way to save money by reducing kitchen waste and landfills.
III. How Composting Works
Through the action of bacteria and various microorganisms, composting can decompose natural materials (including leaves, fruits, and vegetables) into the soil. We add this soil to garden beds to enrich plants.
Composting is a scientific process, and several factors need your attention:
- Temperature
- Size of Materials
- Oxygen
- Heat
- Moisture
Microorganisms are the primary role of the composting process. Aerobic bacteria are the most efficient compost-makers, excreting nitrogen, phosphorus, and magnesium. But anaerobic microorganisms let organic materials ferment and become stinky. No one wants food and garden debris rotting in a corner of their yard. Therefore composting encourages the addition of aerobic bacteria. That is why you have to turn the compost pile(it lets fresh air in).
Compost materials can be divided into two categories: carbon suppliers(Brown) and nitrogen suppliers(Green); The best ratio of carbon and nitrogen materials is 30: 1(This ratio is based on the dry weight and can only be approximated in practical applications.); When you add too much carbon material, the composting process will slow down; Too little carbon, and the compost ferments, gets stinky, and loses its nutrient value;
Fast Method:
The best ratio C(30): N(1); 40-60% Moisture; Aeration(Turning the pile 1-2 times a week); Temperature(90-160°F, you can use a compost thermometer).
Slow Method:
Too much carbon and low temperature will slow down the composting process.
Conclusion:
In fact, it is difficult to achieve a ratio of 30: 1. According to the suppliers’ weight, you can add 2 to 3 pounds of Brown per pound of Green.
Carbon Suppliers(Brown): Hay, Straw, Fall leaves, Wood chips, Corn stalks
Nitrogen Suppliers(Green): Egg shells, Fruit scraps, Vegetable scraps, Fresh leaves, coffee grounds

Tips: Do not add cooked foods, oils, fats, meat, animal bones, pet waste, treated wood, or anything with insecticide exposure.
IV. Three-Step Guide about Composting and 5 Tips
4.1 Step One: Set up the Compost Bin
First, choose an area in your garden or yard for your compost pile, then prepare a suitable container. You can repurpose an old bin or make a DIY compost container(Below, you will find 15 DIY composting bin ideas).
15 DIY Composting Bin Ideas…
#1. Make DIY compost bins from black plastic inexpensive garbage cans with clamping lids(When turning cans, lids should have to be clamping.):
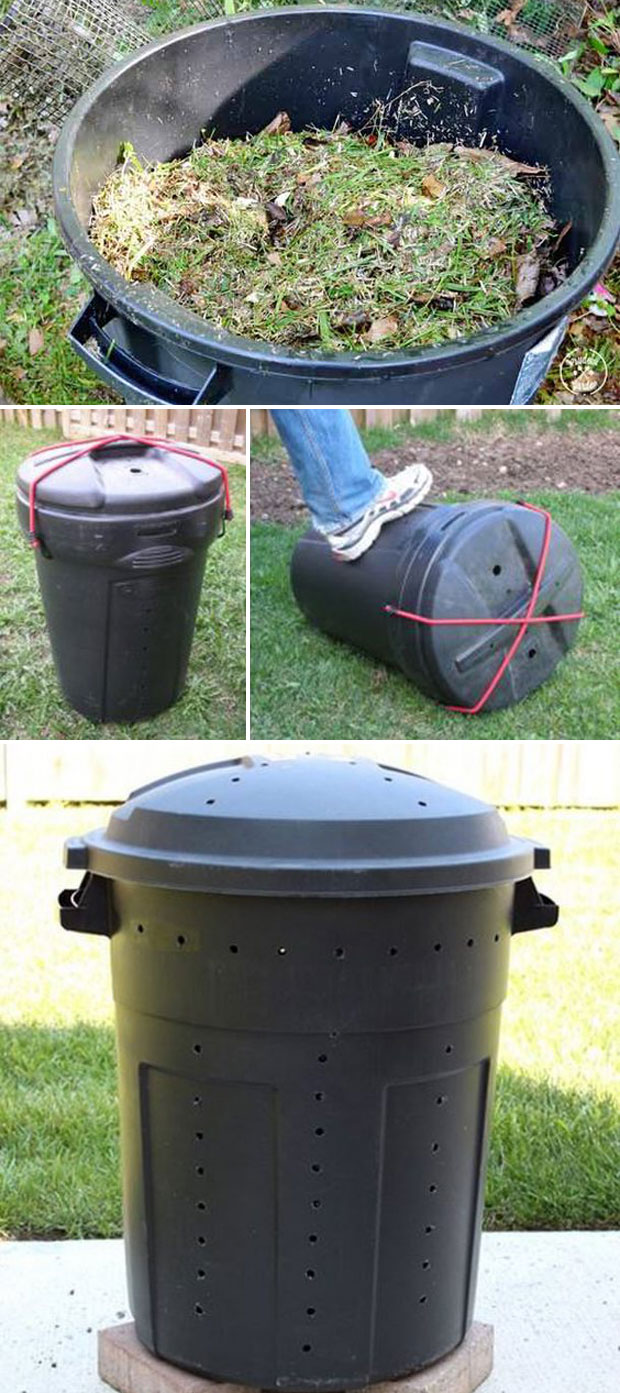
More details at: ahealthylifeforme.com
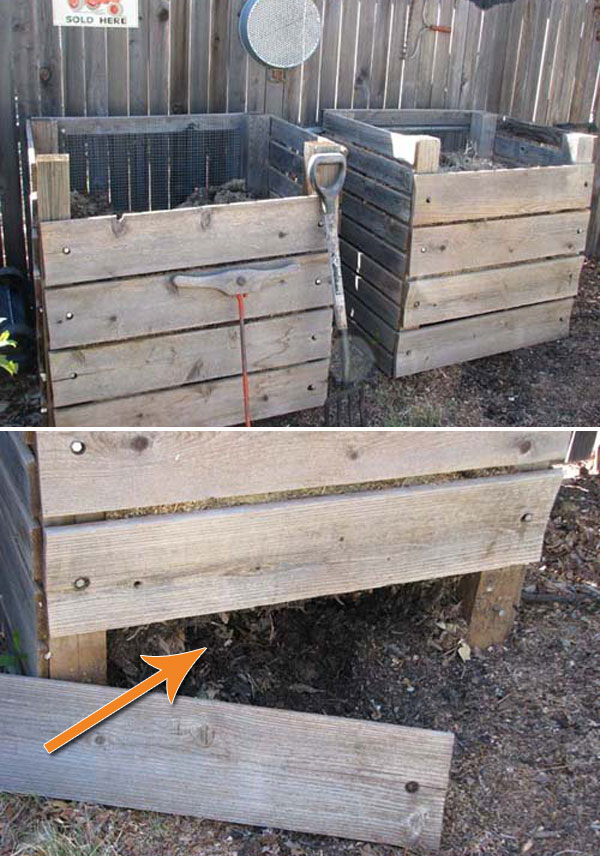
#2. Join several shipping pallets together to make a box for your compost:
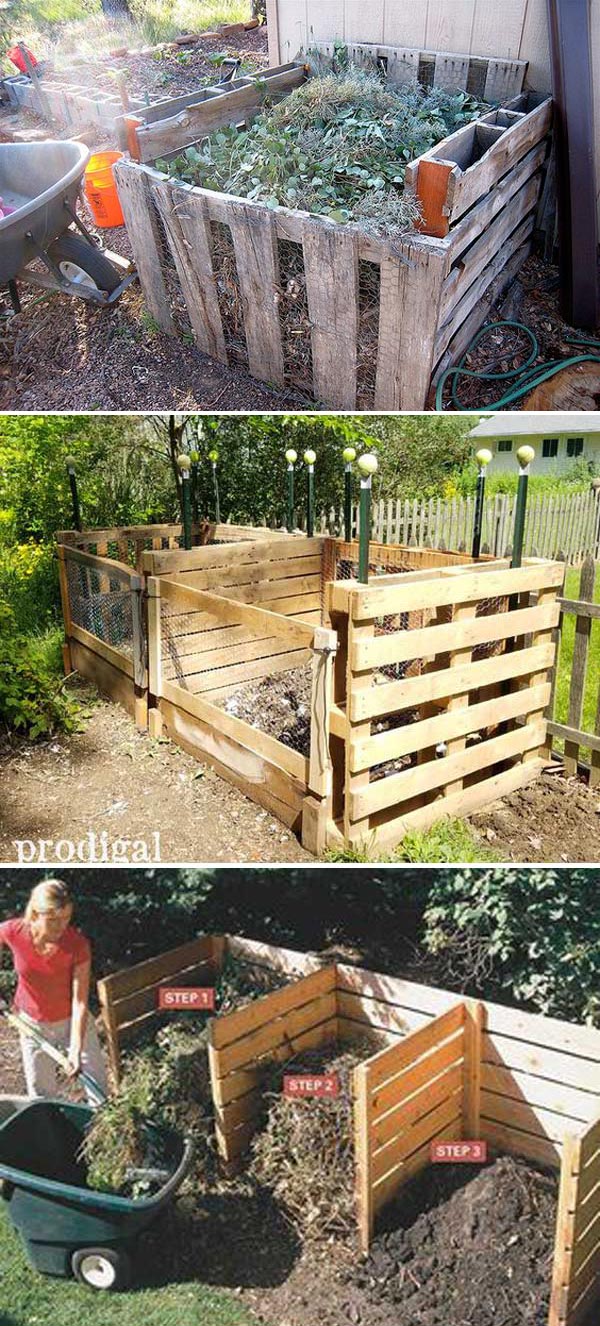
Image via: flickr.com Get the full guide at: diyprojects.com and prodigalpieces.com and familyhandyman.com
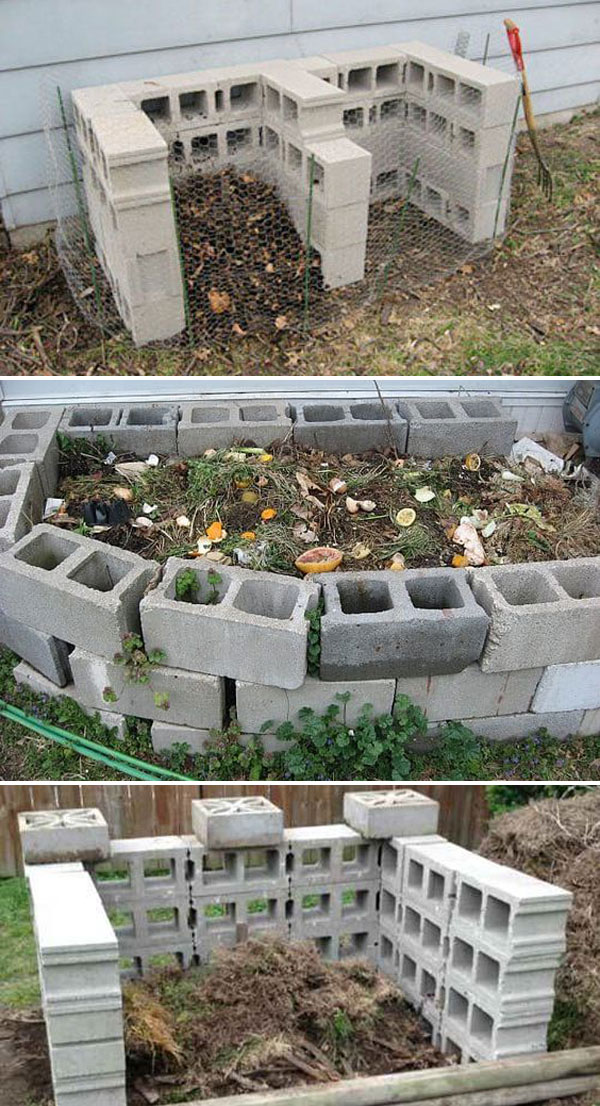
#3. Compost bins built using cinder blocks are more durable than their wooden counterparts:
#4. Build an Angled Block Compost Bin using cinder blocks, chicken wire mesh, and wooden frame:
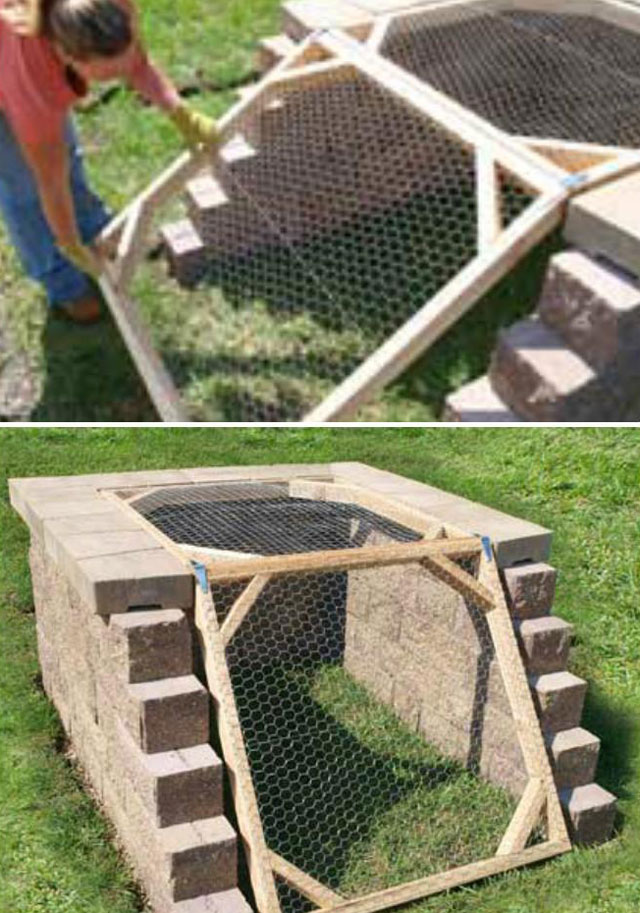
See the video TUTORIAL on: Youtube.com
#5. These are clever compost bins from 50-gallon barrels that take the work out of rotating your compost; you can call them “Tumbling Bins”:
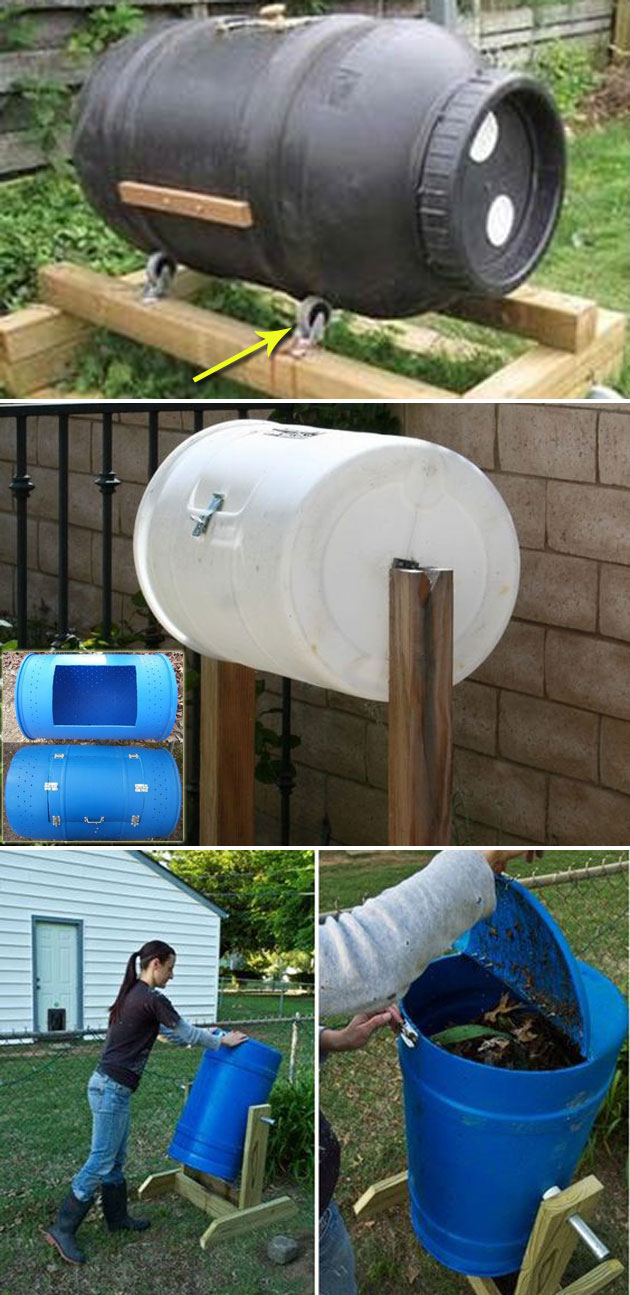
Similar projects TUTORIAL on: Case 1 Case 2 Case 3
#6. Make your compost bin from wire hardware cloth or chicken wire:
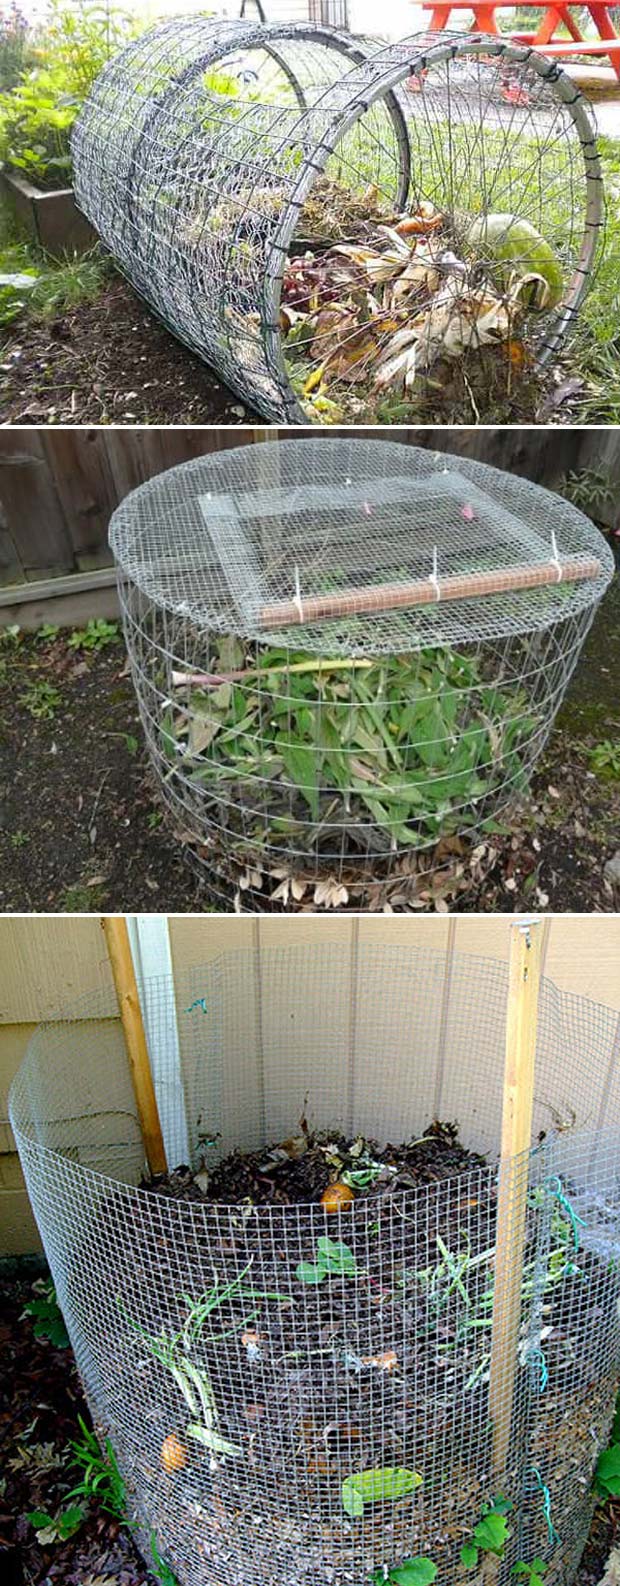
Tutorial on: Motherearthliving.com and Goodshomedesign.com
#7. After setting some thick, straight sticks as a frame, you can weave your compost bin with branches(this structure is right for airflow):
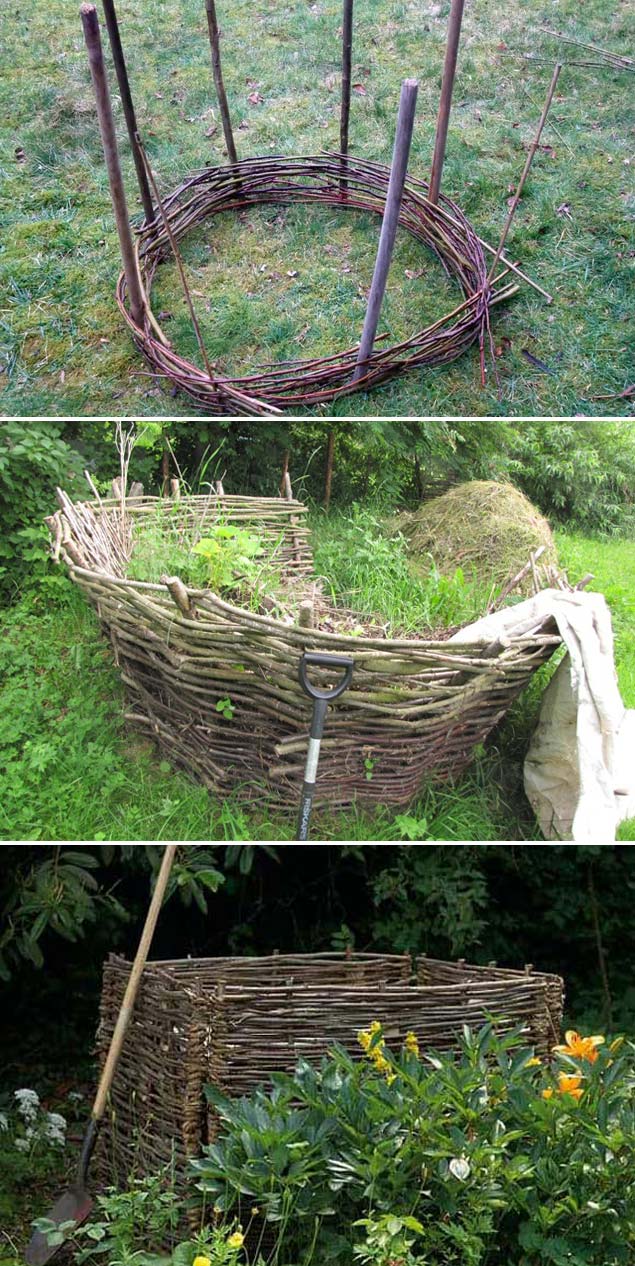
Image via: Louiselangsner.wordpress.com Tutorial on: Instructables.com
#8. Use untreated cedar, some hardware hinges, and wire hardware cloth to install a functional compost bin. The wooden bottom board can be switched on and off. So this lets you easily remove finished compost from the bottom of the pile:
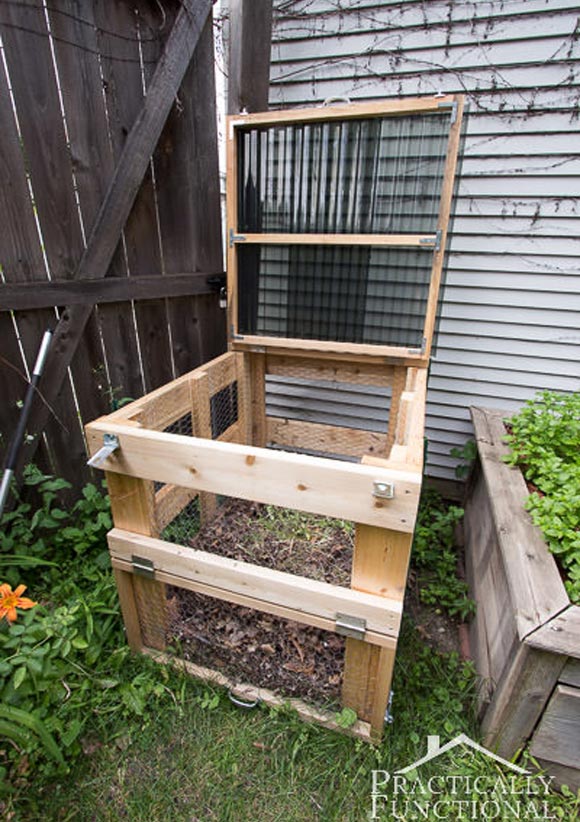
See the full TUTORIAL on: Practicallyfunctional.com
More details at: Birdsandblooms.com
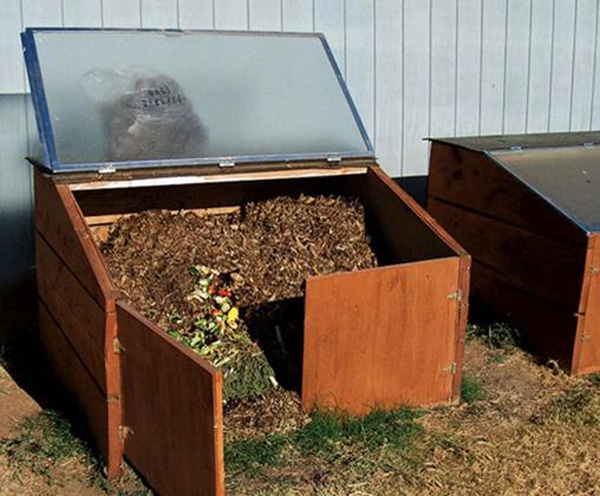
#9. For those of you who need a lot of compost and space allows, then these DIY three bin systems (with a metal roof) look good:
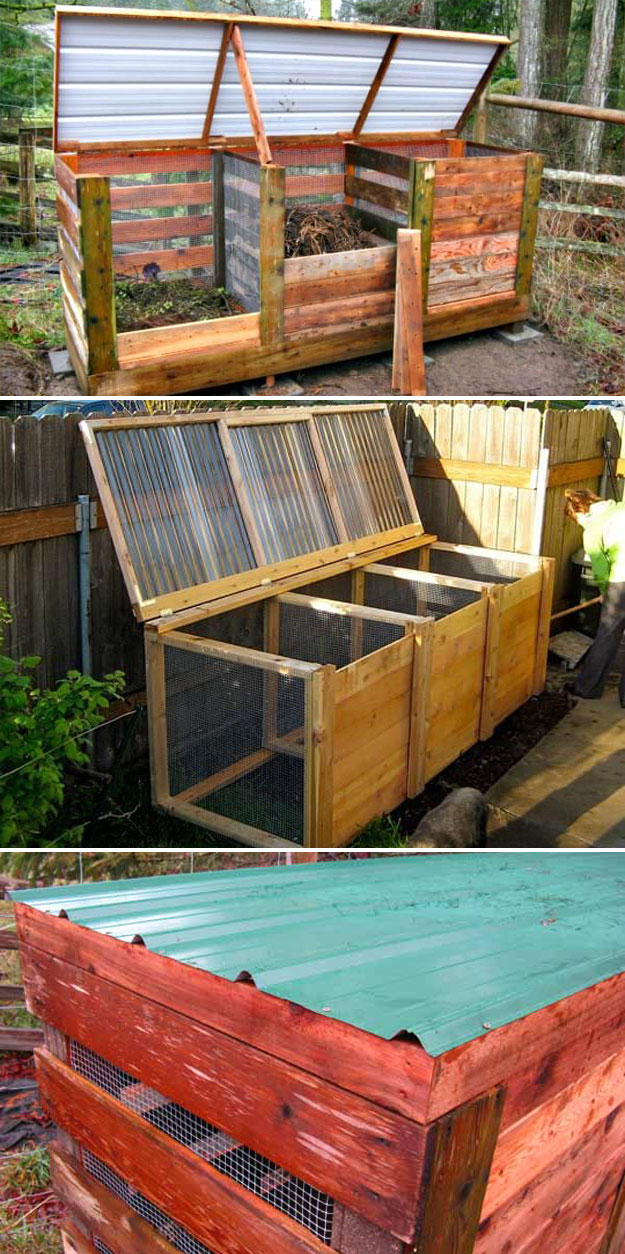
Check out the full Instructions on: Backyardfeast.wordpress.com
#10. Bricks are very cheap materials to build a compost bin. Bricks hold heat, so make it in a shady location to avoid overheating the composting materials:
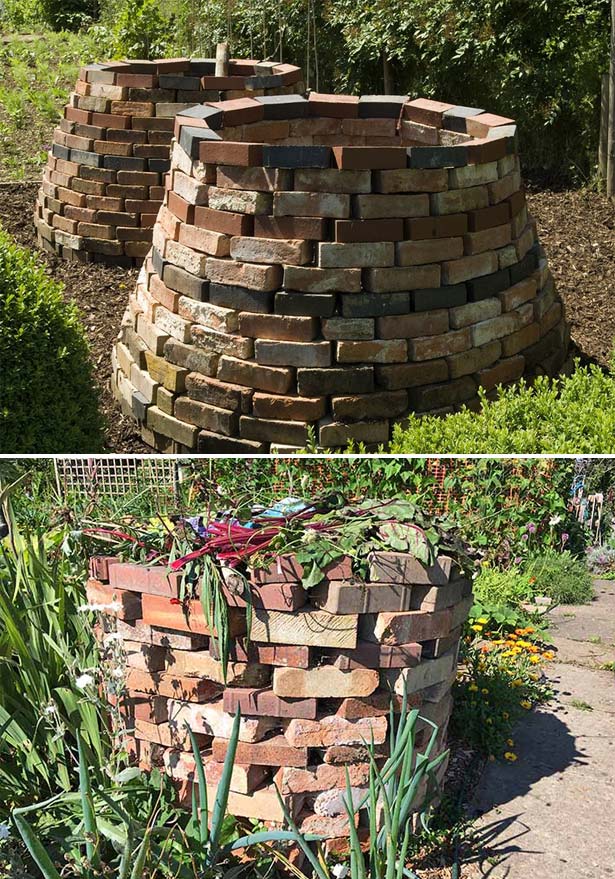
Image via: Greatbigcanvas.com
#11. Use old landscaping timbers or logs to create this easy to build compost bin:
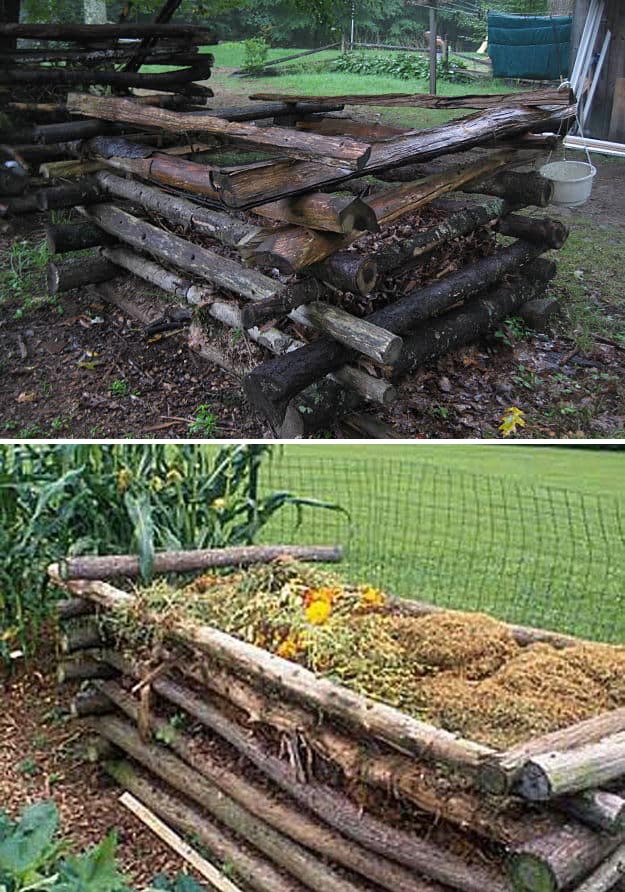
Found on: Homedesigninspired.com
#12. Install a drum-style structure compost bin using the wooden planks, wooden rounds, and the chicken wire. This structure makes the compost contents move and decompose easily and quickly:
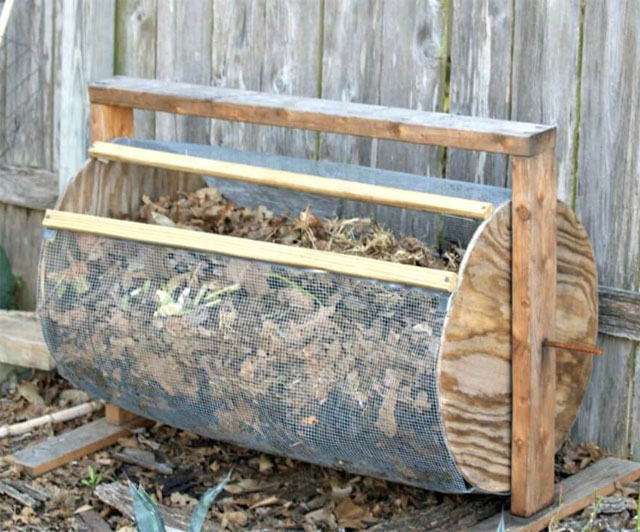
Get the full Guide on: Instructables.com
#13. Just a 5-gallon bucket is all you need to get started with your composting:
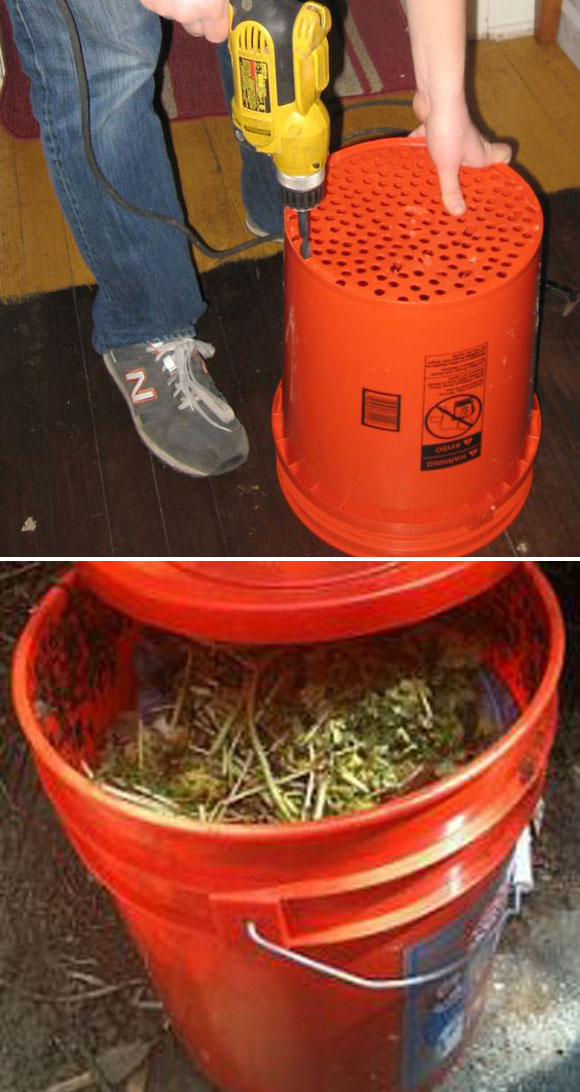
The holes let moisture out and the 5-gallon buckets are light enough, even when full, that you can easily turn and shake them to hasten the composting process.
More details on: Bargainbabe.com
#14. Repurpose a shower door to build a compost bin. The shower door acts like a bit of a greenhouse and heats up the compost, making it decompose faster:
#15. Create a vertical milk crates compost bin that is cheap and easy to make from recycled supplies and offers good air circulation:
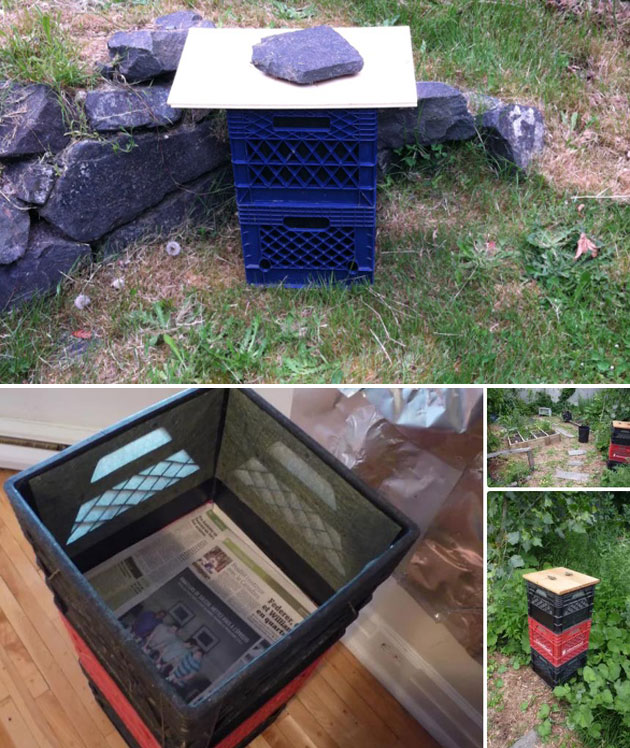
Get the full GUIDE on: Blissfulbritt.com and Instructables.com
4.2 Step Two: Add Materials to the Pile
At this point, you can add your carbon and nitrogen materials to the container. Don’t throw kitchen scraps out for landfill, and they will play an important role in composting.
4.3 Step Three: Wait for the Compost to Be Ready and Use Them
In addition to continuing to add the right stuff to it, you need to maintain the pile, such as you need to turn the pile regularly to get fresh air in.
4.4 Composting Tips
There are a few composting tips will make your composting work success:
#1. Chopped Materials
Chop the materials into small pieces; the smaller the pieces, the faster the materials can be broken down. When adding materials, always bury kitchen scraps in the center of the pile to accelerate degradation and to block flies and other bugs.
#2. Keep Ideal Humidity Level
Too dry materials will prevent compost from breaking down. At this time, you need to add water to the compost. If the compost is too wet, you can add sawdust, hay, and other materials to reach the appropriate consistency.
#3. Turn the Compost Regularly
Ideally, you add new materials and turn the pile every 3-4 days. It provides fresh air for aerobic bacteria. The fork is a perfect tool to turn a compost pile.
#4. Preventing Flooding
A too wet compost will reduce air flow inside the materials and cause a nasty smell. Because in low oxygen levels, the greens can ferment and become stinky due to the production of acids, hydrogen sulfide, and more. Therefore, during the rainy season, prepare a cover such as plastic cloth or a layer of hay to prevent the compost pile from getting too wet.
#5. Improve air flow
Insert a perforated PVC pipe in the center of the pile can greatly improve the flow of air.
V. Can Compost in Winter?
The short answer is yes. Composting in winter is not different than composting in the summer; it is just slower. In the coldest weather, the process simply stalls and the food scraps freeze. When temperatures rise above freezing, the process resumes. The cold temperatures will lower the pile’s overall temperature, so stop turning the pile during the winter months to lock in as much heat as possible.
VI. Ready for Use
When compost is ready for use, it looks, feels, and smells like good, earthy dirt. Then you can use compost to slowly feed your plants over a long period instead of expensive chemical fertilizers.