Are you eager to become a skilled plant ‘parent’? Embarking on the journey of growing your plants from tiny seeds indoors is a wonderful beginning. Yet, for those new to gardening, initiating the seed-starting process can be a bit perplexing. To make this adventure both delightful and foolproof, we present a thorough and user-friendly guide.
Dreaming of lush gardens and homegrown delights? Starting your plants from seeds allows you to bring this vision to life. However, every green thumb knows that beginning with seeds can be a bit like embarking on a gardening expedition. To navigate this journey with ease and joy, we’ve crafted a comprehensive guide to seed starting.
1. The Importance of Starting from Seeds
Starting your own seeds indoors is a cost-effective and rewarding method for home gardeners.
Not only does it save money compared to purchasing young plants, but it also opens up a wide array of plant varieties for you to explore.
This method extends your growing season, allowing you to enjoy gardening for an extended period.
Furthermore, starting from seeds provides an opportunity to experiment with unique or uncommon plants, adding an extra layer of enjoyment to your gardening experience.
2. How to Pick the Right Seeds?
Choosing the right seeds is crucial for a successful garden. If you’re new to gardening, selecting seeds might seem a bit daunting.
To simplify the process, consider watching a video tutorial or reading a detailed post on ‘How to Choose the Best Seeds for Your Garden.’
These resources can provide valuable insights and make the selection process more manageable.
3. Knowing When to Start Seeds
Determining the optimal time to start seeds depends on your gardening zone, which is categorized by temperature.
Check your seed packet for information on plant hardiness zones and the recommended planting time.
In most northern hemisphere regions, late March to late May is typically the prime time to initiate seed starting.
Finding Your Frost Dates and Hardiness Zone:
Utilize the Frost Dates Calculator at Almanac.com. Simply enter your city and state or province to discover your first and last frost dates, along with the number of frost-free days in your area.
4. Tips for Starting Seeds
While starting plants from seeds may pose challenges, employing effective techniques can ensure a successful outcome.
Explore low-budget gardening ideas to make your gardening tasks more economical and discover additional tips for nurturing seeds into healthy, thriving plants.
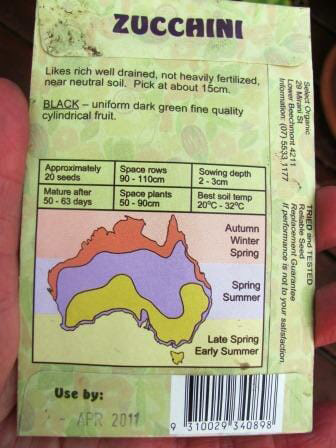
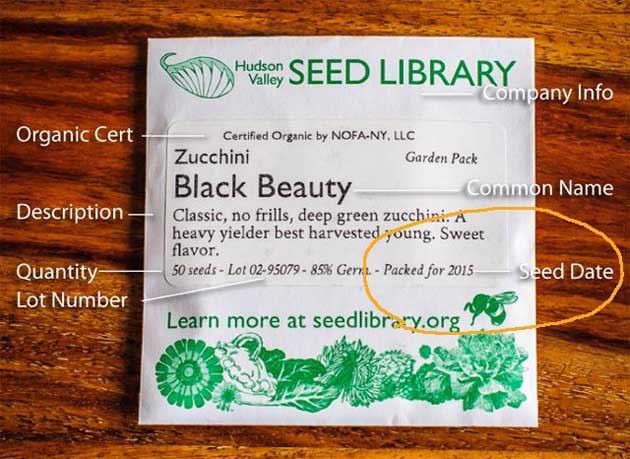
4.1. Check the Use of Seeds by Date
4.2. Prepare Pots or Flats
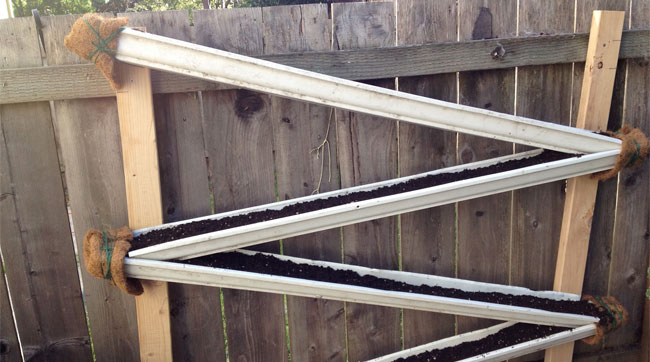
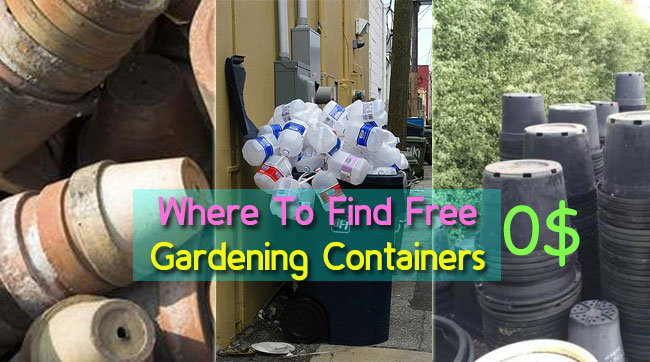
4.2.1. Make DIY Seed Pots and Trays by Recycling Unused Containers
Instead Of Buying Them from Store, You Can Make DIY Pots and Trays. Check the following 19 ideas…
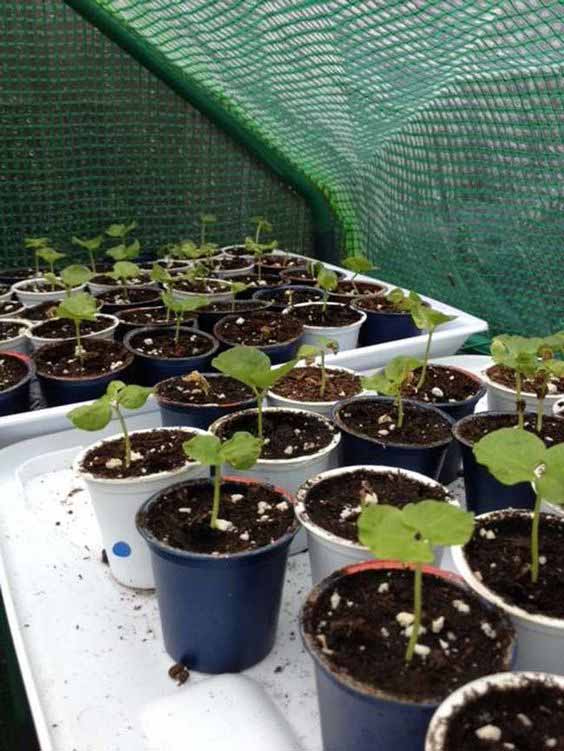
#1. Reuse Plastic Container to Make Mini Greenhouses:
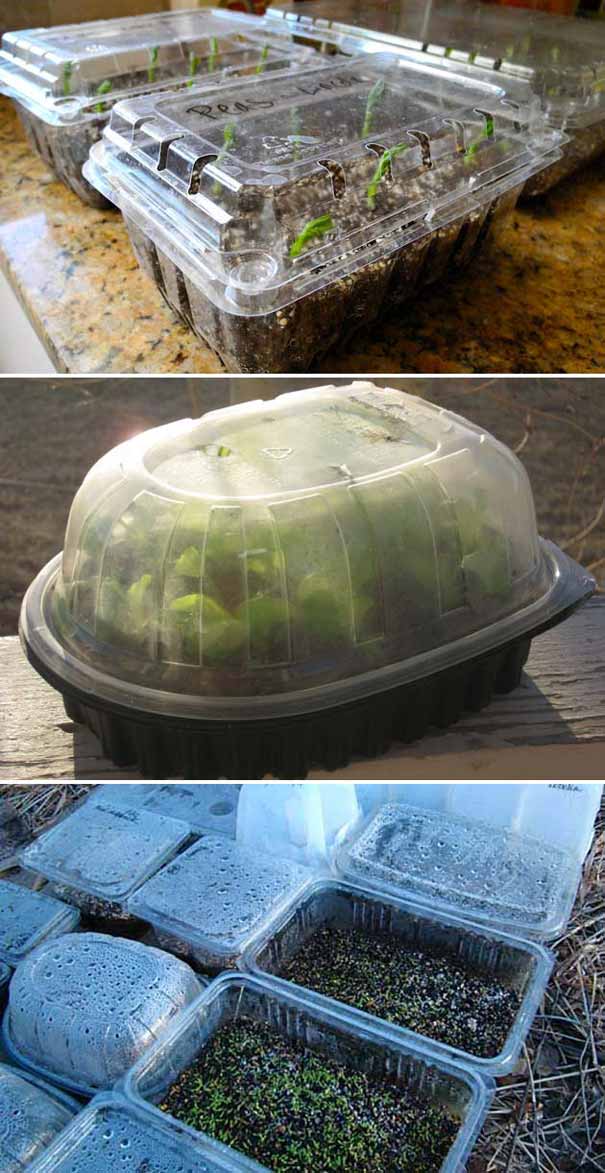
via: singingasongofsixpence.blogspot.com & larksperennials.com
#2. Newspaper Seed-Starters:
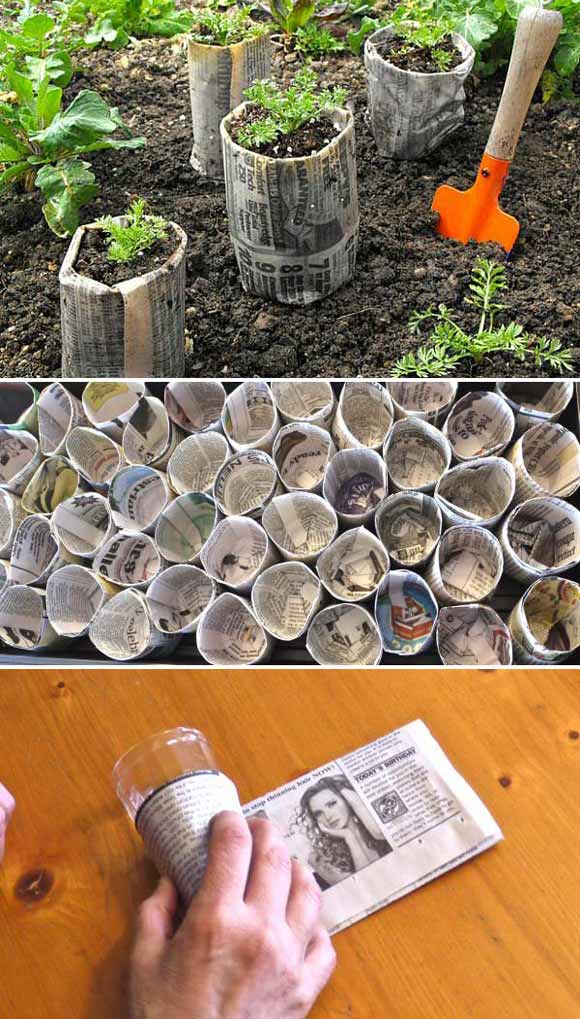
See the tutorial at: learningandyearning.com
#3. Repurpose K-Cups as Starter Pots:
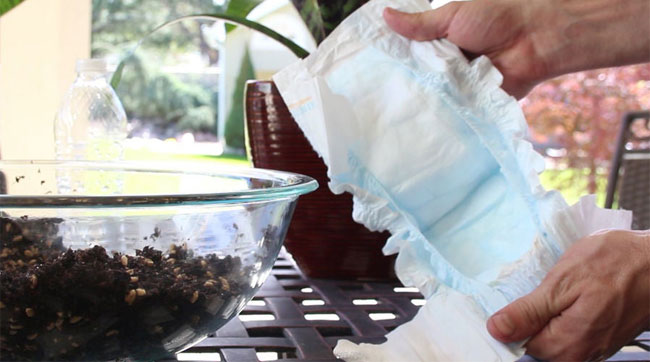
#4. Turn into Toilet Paper Rolls Seed-Starters:
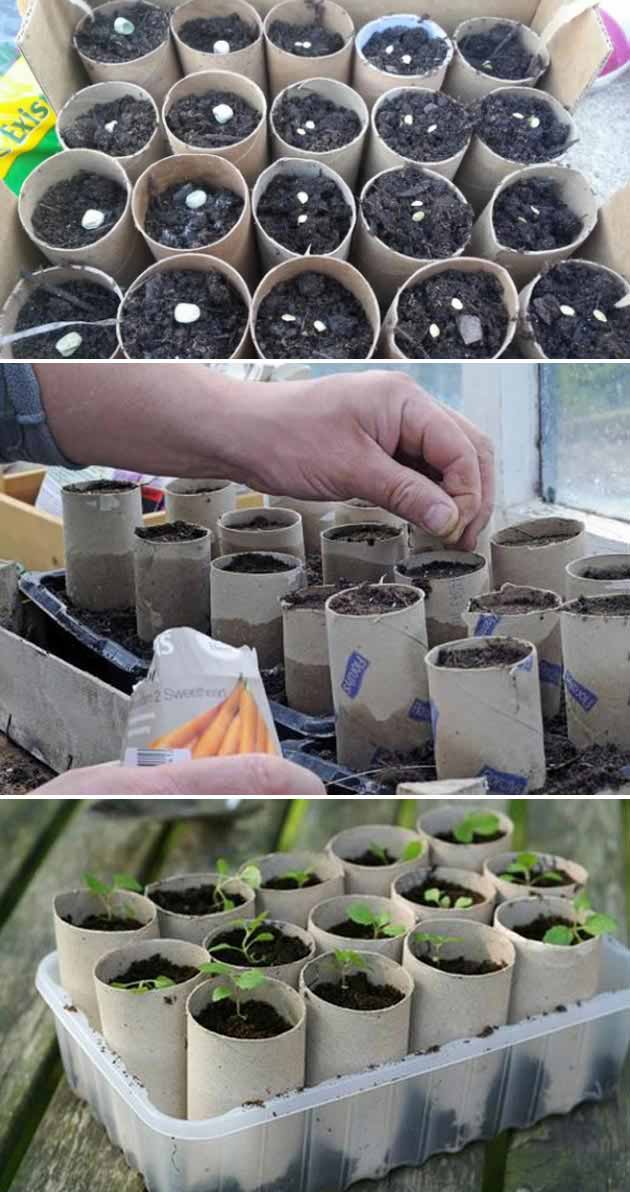
See the tutorial at: ourwabisabilife.com
#5. Repurposed Loofah Sponge Seed Starter:
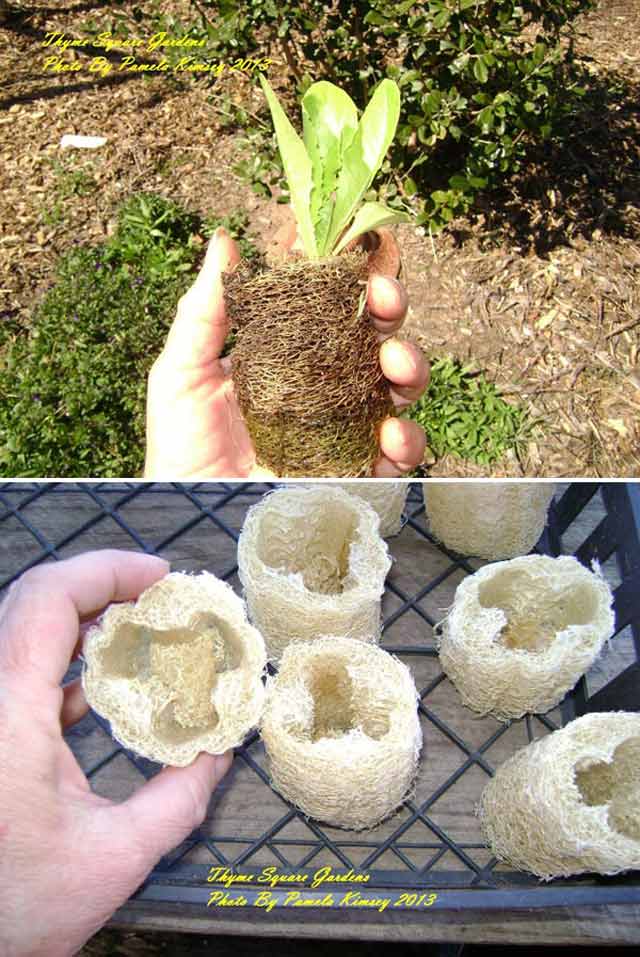
See the tutorial at: thymesquaregarden.blogspot.com
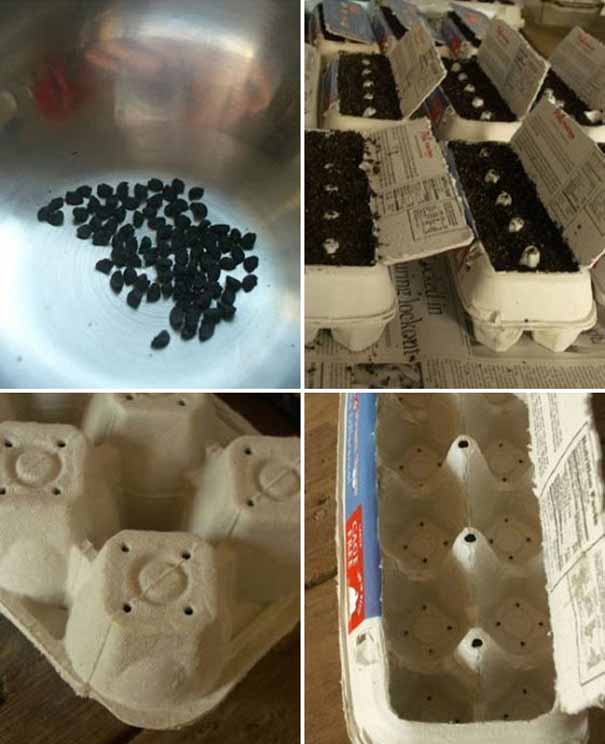
#6. After Seeds Sprout, Place the Egg Carton all into the Ground:
#7. Transform an Old Ice Cube Tray to Seed-Starter:
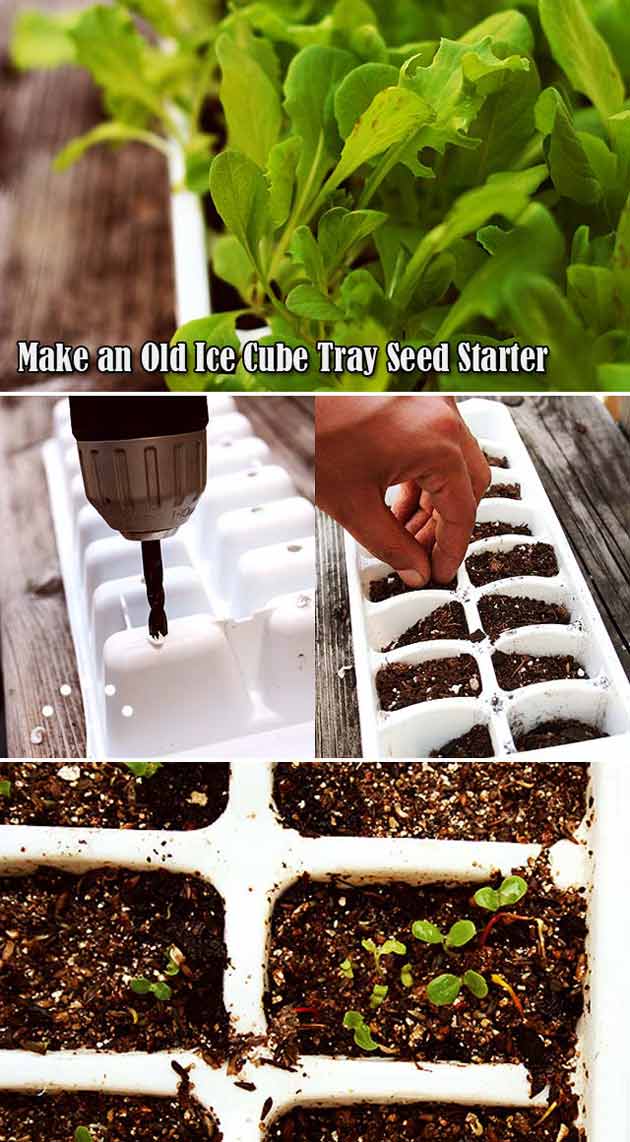
See the tutorial at: mrbrownthumb.blogspot.com
#8. Seed-starters Made of Worn-out Paper Pulp:
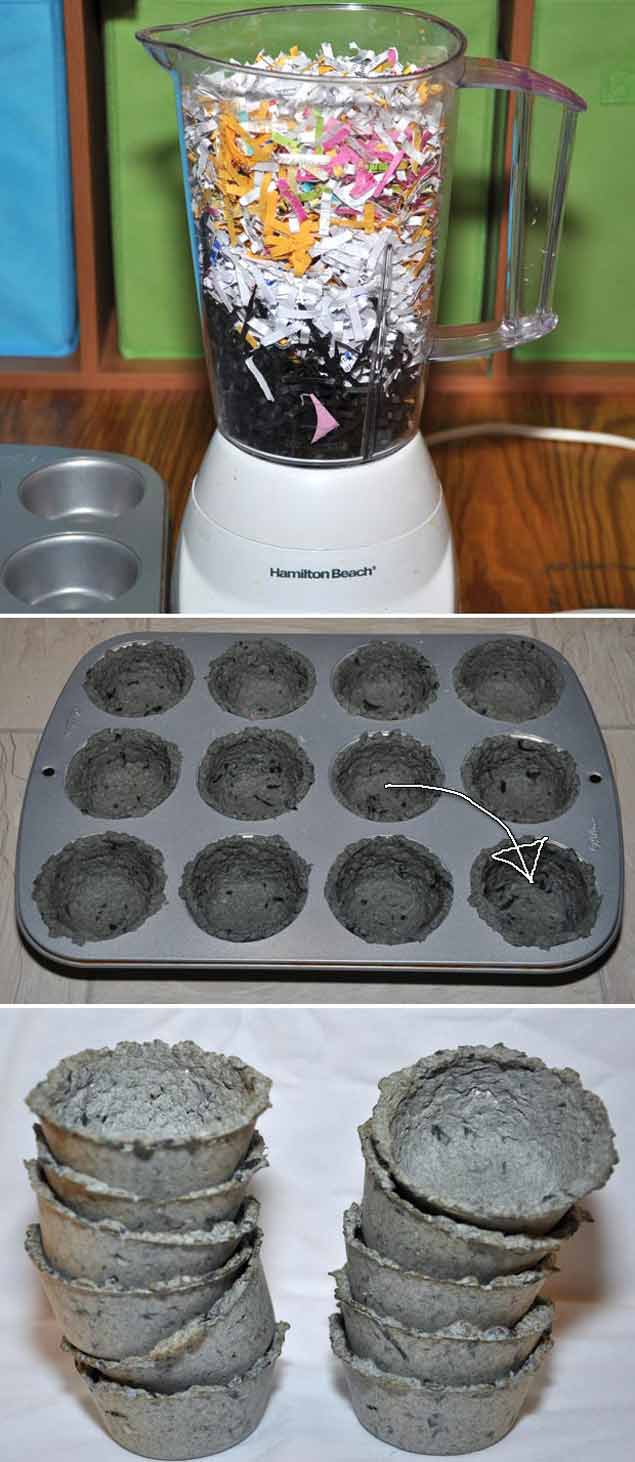
See the tutorial at: 365daysofdiy.blogspot.com
#9. Sow in Gallon Bags:
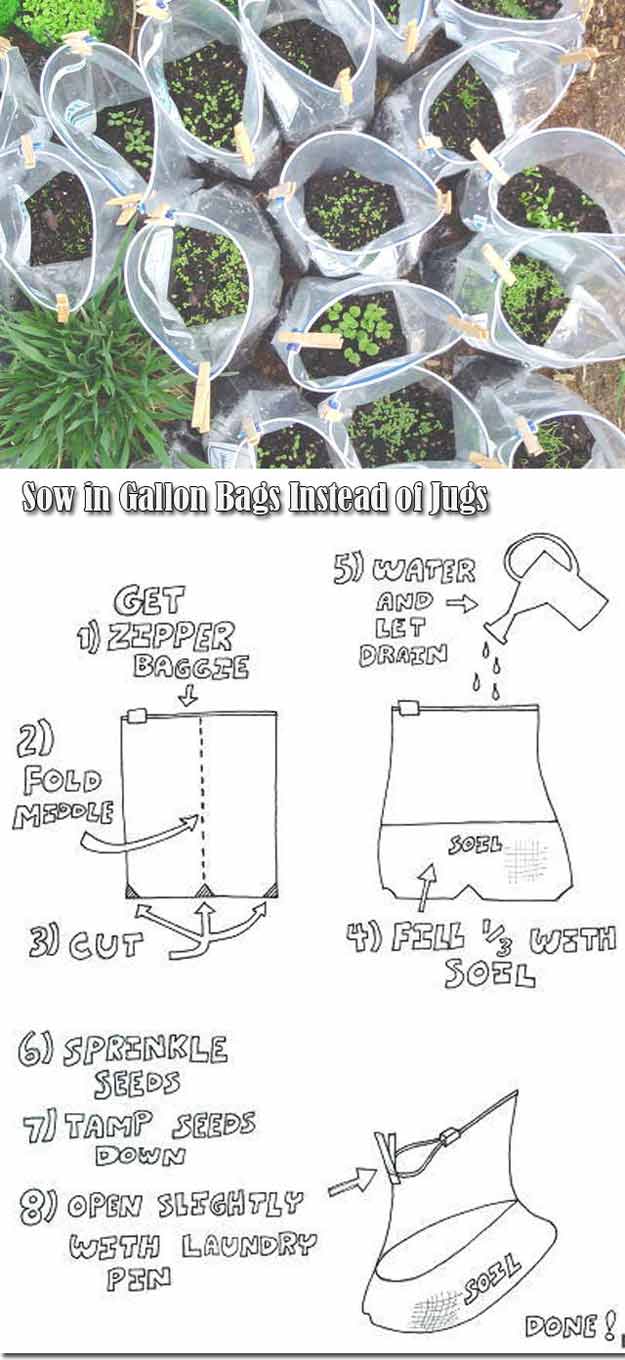
Check out the more details at: wintersown.org
#10. Milk Jug Seed Starters:
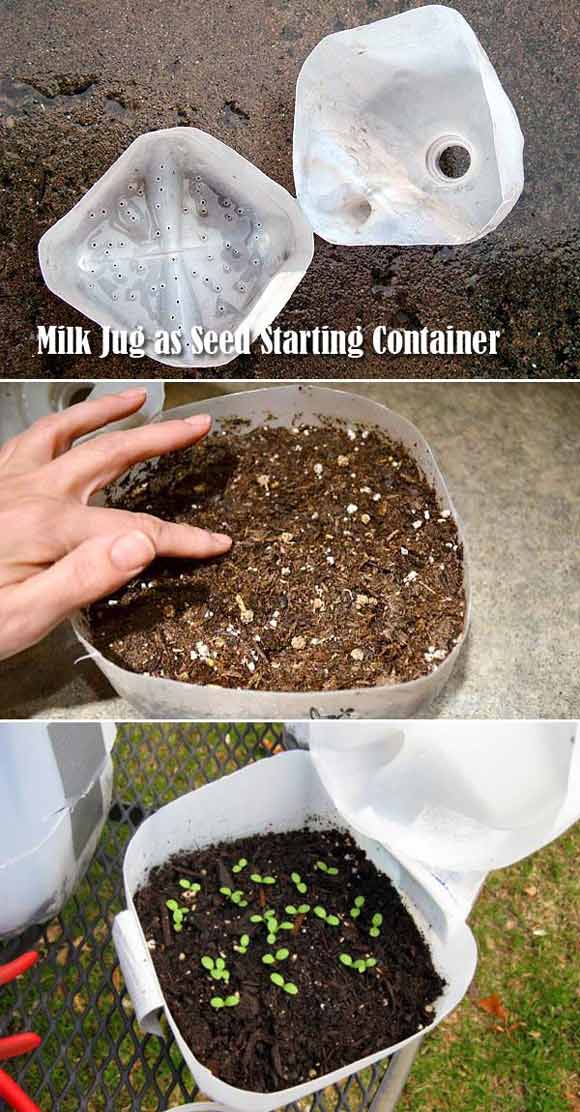
See the tutorial at: ourlittleacre.blogspot.com and agardenforthehouse.com
#11. With soil blocks you do NOT need pots or anything else:
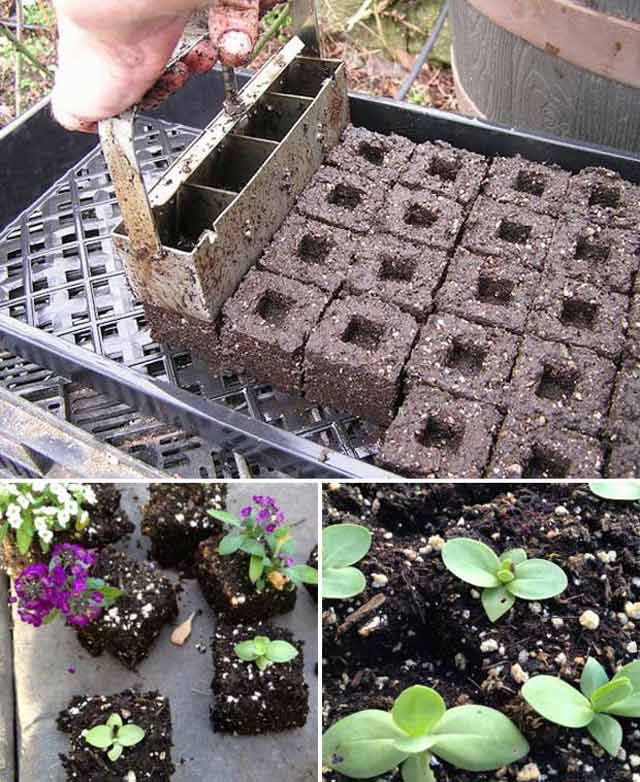
See the tutorial at: baremtnfarm.blogspot.com and victoriaelizabethbarnes.com
Get the Soil Blocker Tool at Amazon.
#12. Make a Soil Block Maker Using a Piece of Cutting PVC Pipe and a Wood Plug:
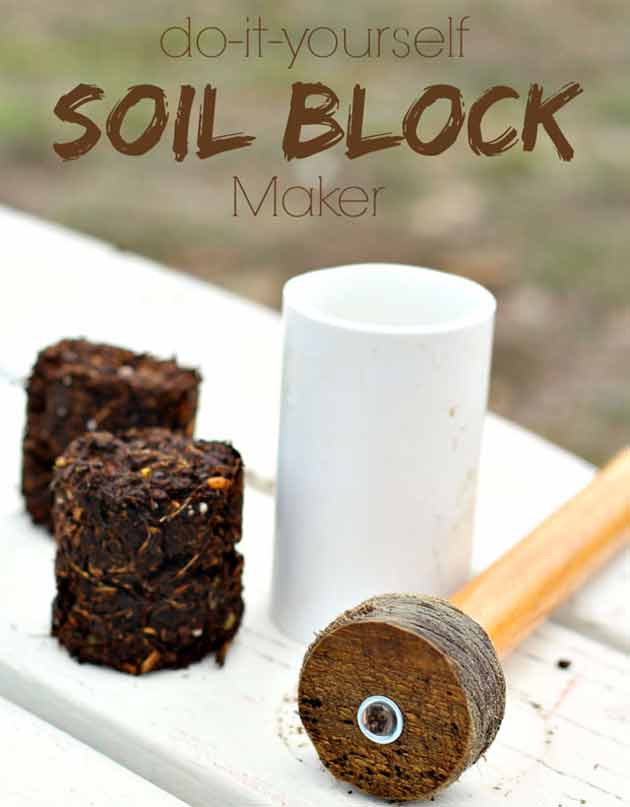
See the tutorial at: theprairiehomestead.com
#13. Recycle Plastic Cup to Make Soil Blocks:
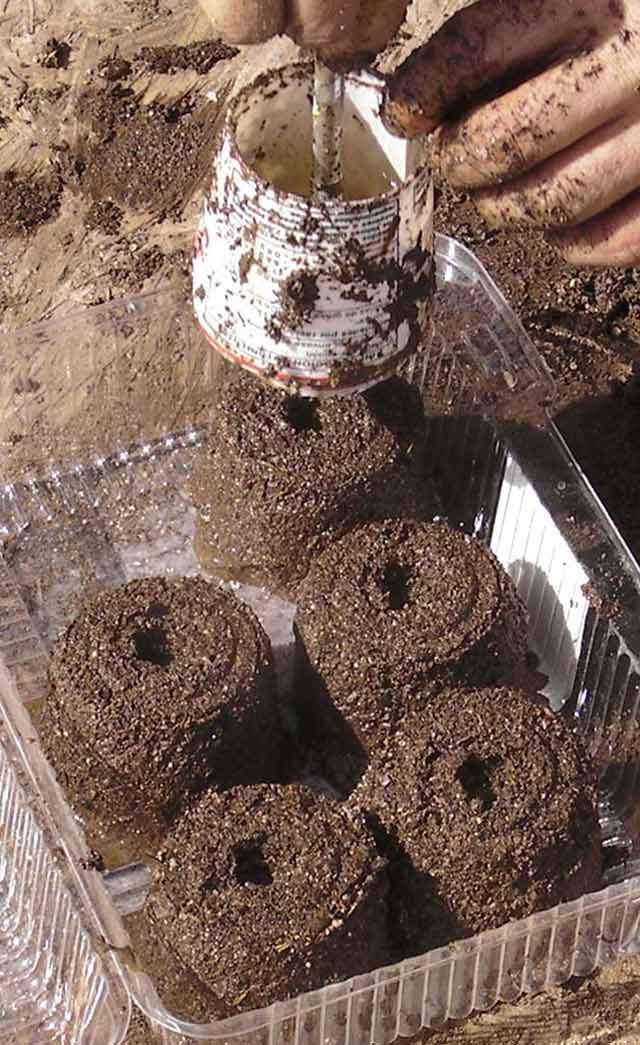
Get the instructions at: instructables.com
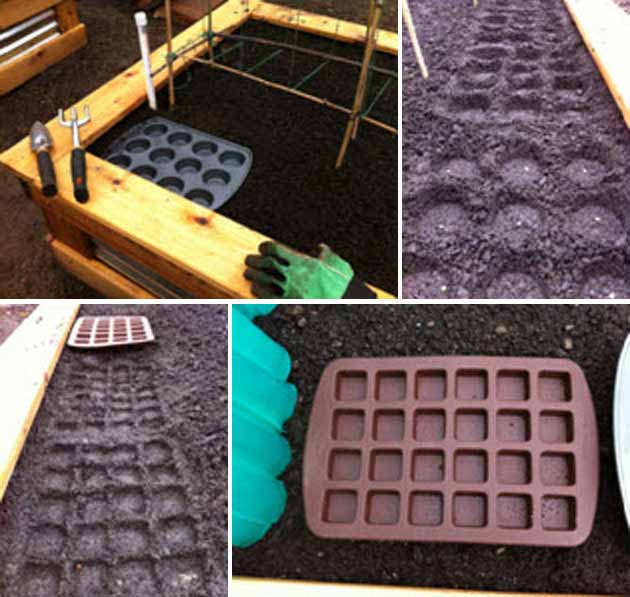
#14. Baking Tins for Square Foot Gardening Templates:
#15. Seed Starting Tray Made from a Cardboard and Some Coffee Filters:
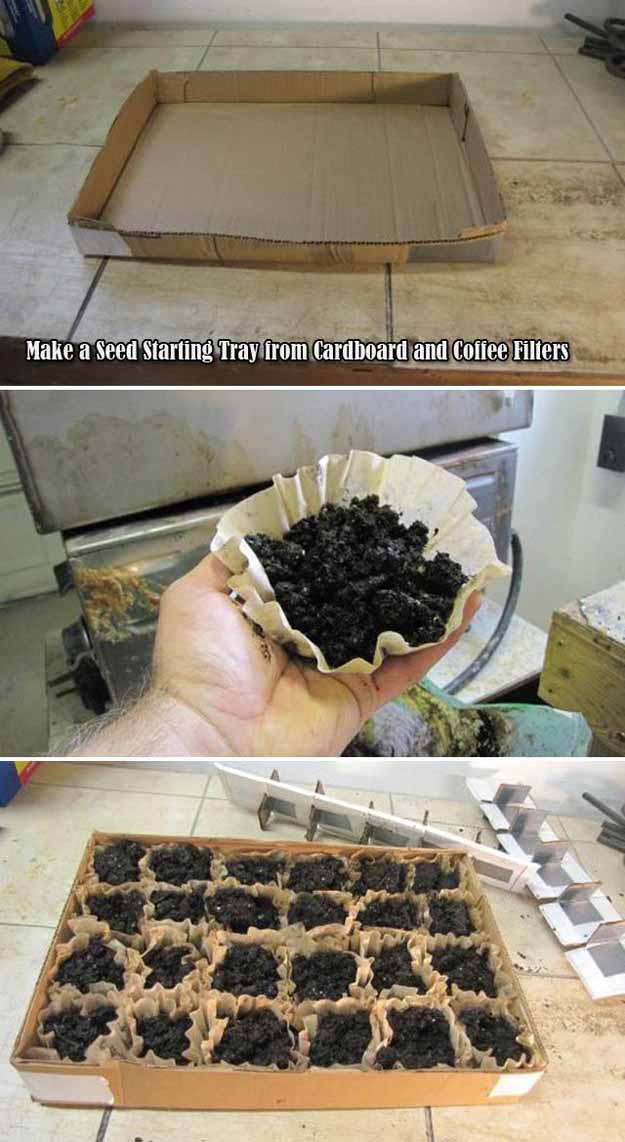
See the full tutorial at: instructables.com
#16. Wine Cases with Dividers Turn into a Seed Tray:
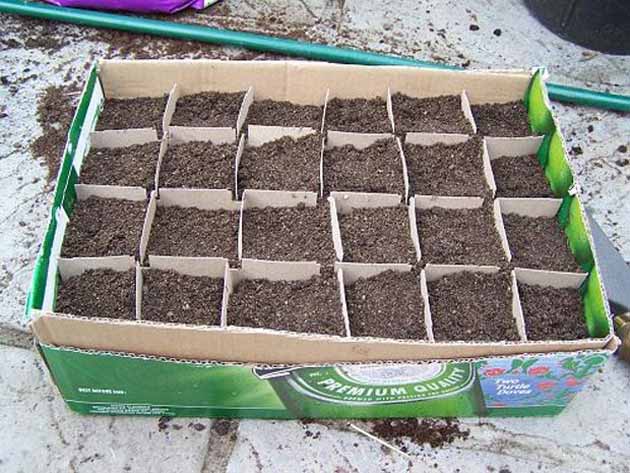
See the more details at: blogcrumbs.blogspot.com
#17. Create Reusable Wood Flats for Seedlings:
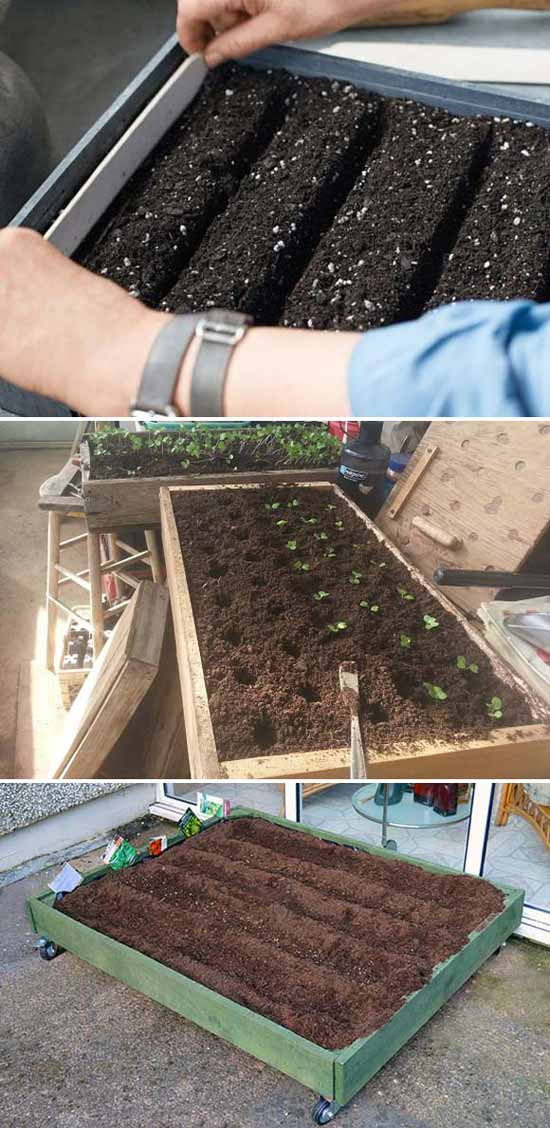
See the more details at: motherearthnews.com
4.2.2. Clean and Sanitize Seed Pots or Flats
Begin by washing pots and flats in warm soapy water. Afterward, soak them in a solution of 1 part bleach and 9 parts water for two minutes. Thoroughly rinse and allow them to drain.
4.3. Prepare seed starting mix
Select ‘seed starting mix’ instead of garden soil, as it compacts easily and may carry diseases.
You can buy seed starting soil from a local nursery or make your own. Opt for organic products without additives if purchasing.
There are various DIY recipes shared by gardening enthusiasts.
One ideal homemade mix consists of equal parts garden soil, vermiculite (for water retention), and sterilized peat or compost (like leaf mold or other soil), heated in a microwave roasting bag for 10 minutes (82 °C).
4.4. Moisten Seed Starting Mix
Add water to the soil mix, ensuring not to overwater. The mixture should stay together when squeezed in hand without water dripping out.
Excessively wet soil can lead to rotted seeds and hinder germination.
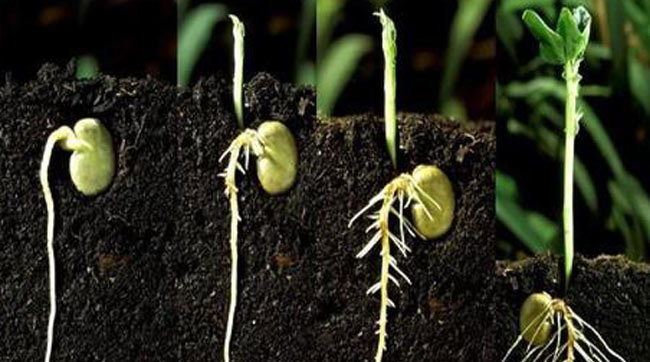
4.5. Plant Seeds
Refer to the seed packet for depth and spacing instructions. Once placed, cover the seeds gently with soil and lightly water.
4.6. Label Seeds
Use tags or labels to track planting details such as seed name, sowing date, germination time, and days to maturity. Explore various DIY ideas to label the garden plants.

4.7. Cover Pots
Create a greenhouse effect by covering pots with loose plastic, wrap, or bags to retain soil moisture.
Periodically remove the covering to allow air to reach the seeds. Remove covers once seeds begin to sprout.
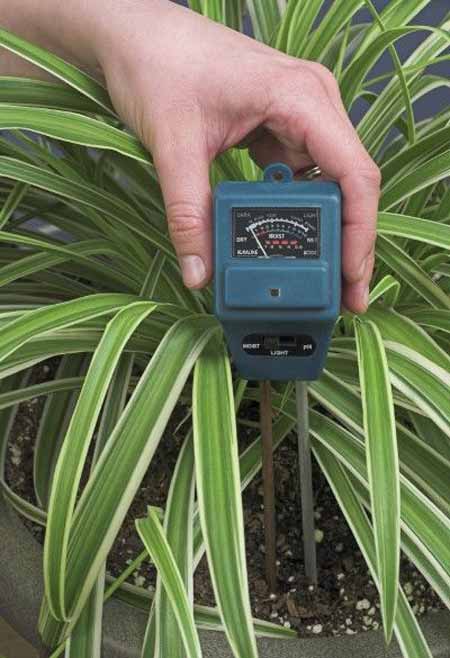
4.8. Set in Warm Location & Check The Soil Moisture
Place newly seeded pots in a warm location, such as on a water heater top, heat mat, or sunny window.
Keep the seed starting mix consistently moist without overwatering. A Moisture Meter can be a useful tool for this purpose.
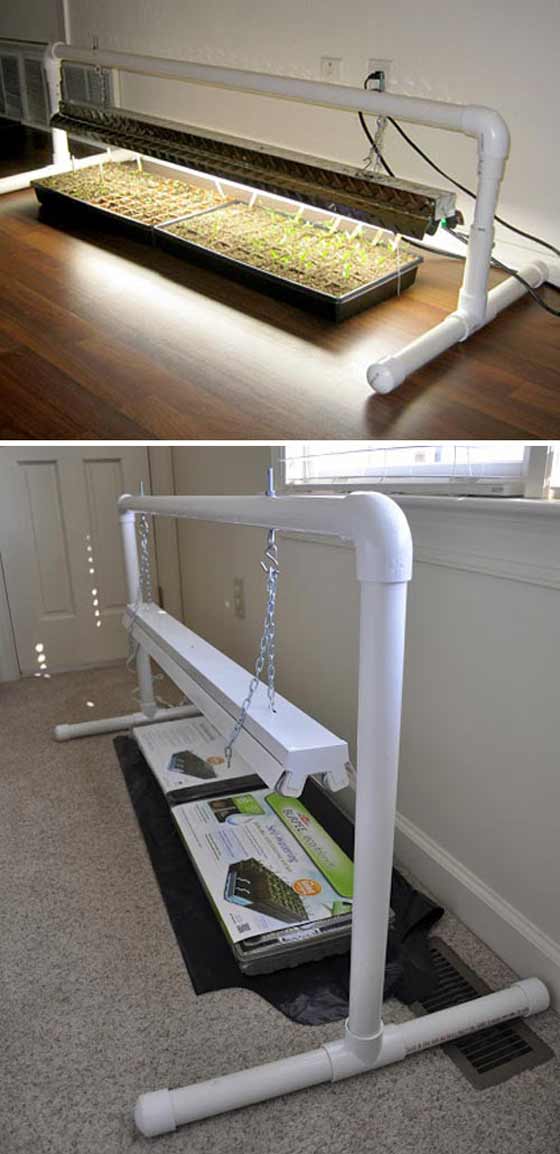
DIY Heat Mat Speeds Seed Starting:
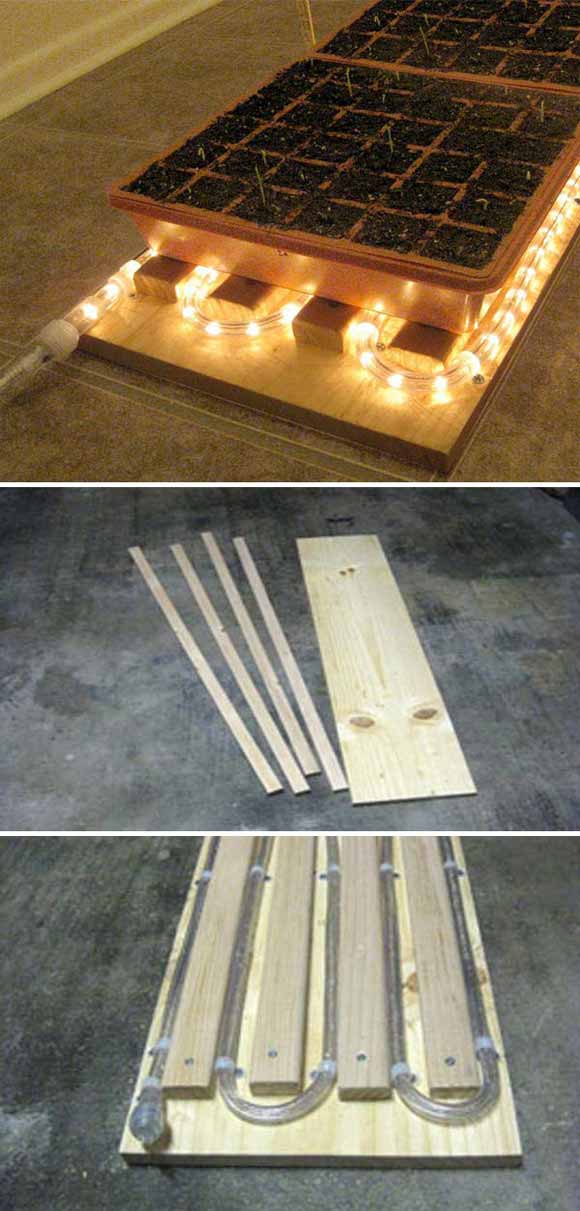
Get the full tutorial at: vegetablegardener.com
4.9. Light
For indoor seed raising, natural light or fluorescence is ideal.
Proper lighting promotes straight growth and prevents weak stems.
Some seeds require germination in darkness, so check the seed packet for specific instructions.
Explore low-budget gardening ideas for additional tips to make gardening tasks easier.
See the full instructions at: vegetablegardener.com
4.10. Harden-off Plants
Harden off your plants by gradually acclimating them to the outdoors.
Once they’ve grown two to three sets of leaves, start placing them outside for increasing durations.
Begin with two hours a day, gradually extending the time until they can be left outside for a whole day and night.
5. Transplanting Outdoors
For a successful transition to the great outdoors, consider transplanting on an overcast day and during the early morning hours.
This strategy shields your plants from the harsh midday sun, ensuring a smoother adaptation.
Additionally, remember to maintain adequate watering and stay vigilant for any weather extremes.
Young plants require tender care and attention during this critical phase. Now, let’s embark on the exciting journey of sowing and nurturing your garden!