Are You a Beginner Gardener?
If the answer is a resounding ‘YES,’ then you’re in for an exciting journey! Starting plants from seeds is a rewarding and cost-effective way to grow a thriving garden. However, many beginners make common mistakes that can lead to poor germination rates or weak seedlings.
But don’t worry! With the right knowledge and preparation, you can increase your success rate, enjoy the process, and watch your plants flourish from tiny seeds into beautiful greenery. Let’s dive into the essentials of seed starting!
(A) Why Do We Need to Start Plants from Seeds?
You might wonder, why go through the effort of starting plants from seeds when you can simply buy young plants from a nursery? Well, there are several compelling reasons:
-
Wider Variety – Nurseries often carry a limited selection of plants. By starting from seeds, you can grow unique, rare, or heirloom varieties that you won’t find in stores.
-
Better Timing – You can start your plants at the perfect time for your region, ensuring stronger and healthier growth.
-
Cost-Effective – Buying a pack of seeds is usually much cheaper than purchasing mature plants.
-
Gardening Satisfaction – Watching a plant grow from seed to maturity is incredibly rewarding and deepens your connection to nature.
With these benefits in mind, let’s move on to the first step: selecting the right seeds!
(B) Choose the Right Seeds for Your Garden
Before you start planting, it’s crucial to choose the right seeds based on your gardening goals and environment. Here’s how to do it:
-
Decide What You Want to Grow – Are you interested in vegetables, flowers, or herbs? Consider your space, climate, and personal preferences.
-
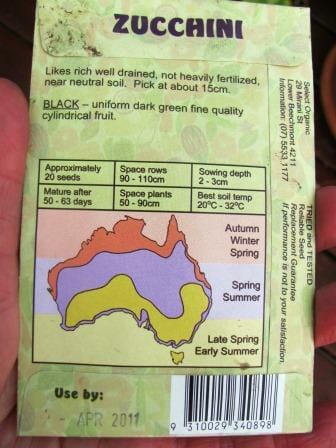
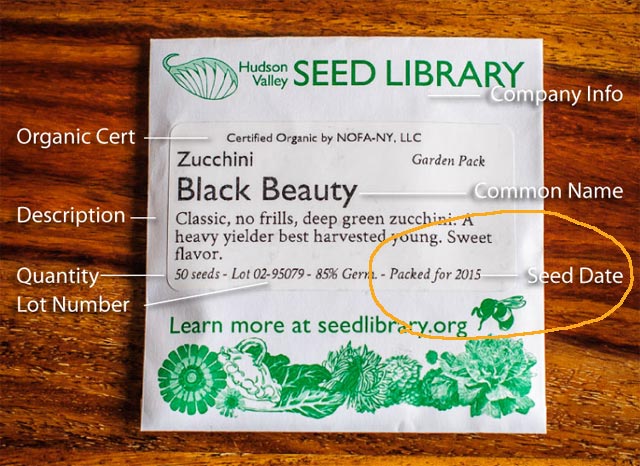
Read Seed Packets Carefully – Seed packets contain essential information, including germination time, ideal planting depth, and specific care instructions.
-
Do Your Research – Look up reviews or guides on different seed varieties to find ones that suit your garden best.
For additional help, check out the video tutorial and article, “How to Choose the Best Seeds for Your Garden” by Empress of Dirt.
(C) Starting Seeds at the Right Time
Timing is everything when it comes to seed starting. Planting too early or too late can affect your success rate. Here’s what you need to do:
-
Check Your Seed Packet – Most seed packets indicate the best planting window based on temperature and season.
-
Know Your Climate Zone – The success of your seeds depends on your hardiness zone.
-
Use a Moon Calendar – Some gardeners follow moon phases to maximize germination rates.
How to Find Your Frost Dates and Hardiness Zone:
-
Use the Frost Dates Calculator on Almanac.com. Enter your city and state/province to find your region’s frost-free dates.
-
Cross-check your planting schedule with the USDA Hardiness Zone Map to determine the best timing for your plants.
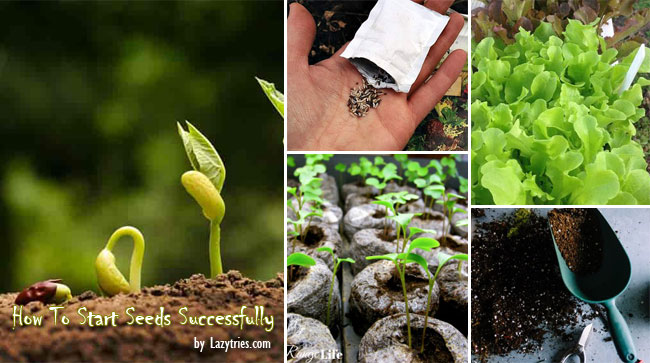
(D) Step-by-Step Tips for Seed Starting
Once you have chosen your seeds and determined the best planting time, it’s time to get started! Follow these detailed steps:
1. Check the Seed Packet’s Expiry Date
Seeds have a shelf life. Always check the ‘Use-By’ date to ensure viability.
2. Prepare and Sanitize Your Seed Trays, Pots, and Containers
Using clean containers prevents diseases and mold from harming your seedlings.
a. How to Clean Your Seed Trays and Pots:
-
Remove any old soil or debris.
-
Wash containers with warm, soapy water.
-
Soak them in a diluted bleach solution (1 part bleach to 9 parts water) for 10 minutes.
-
Rinse thoroughly and let them air dry completely before use.
b. Instead Of Buying Them From a Store, You Can Also DIY Pots and Seed Trays:
1). DIY Pots for Starting Seeds:
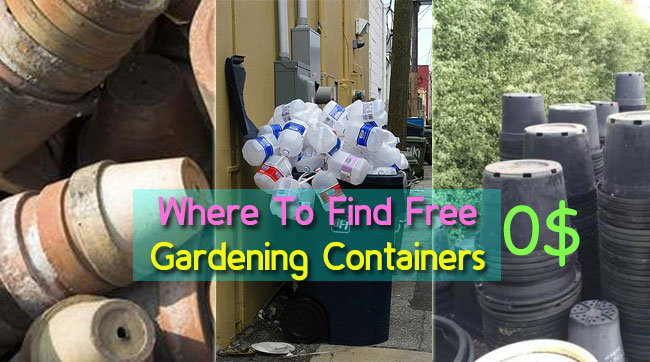
DIY Seed Starting Containers: Eco-Friendly and Budget-Friendly Solutions
Starting seeds doesn’t have to mean spending money on store-bought trays and pots. Instead, you can repurpose everyday household items to create sustainable and cost-effective seed-starting containers. Not only will this help reduce waste, but it will also add a creative and personal touch to your gardening experience. Here are some practical DIY options to consider:
1. Repurpose Plastic Containers into Mini Greenhouses
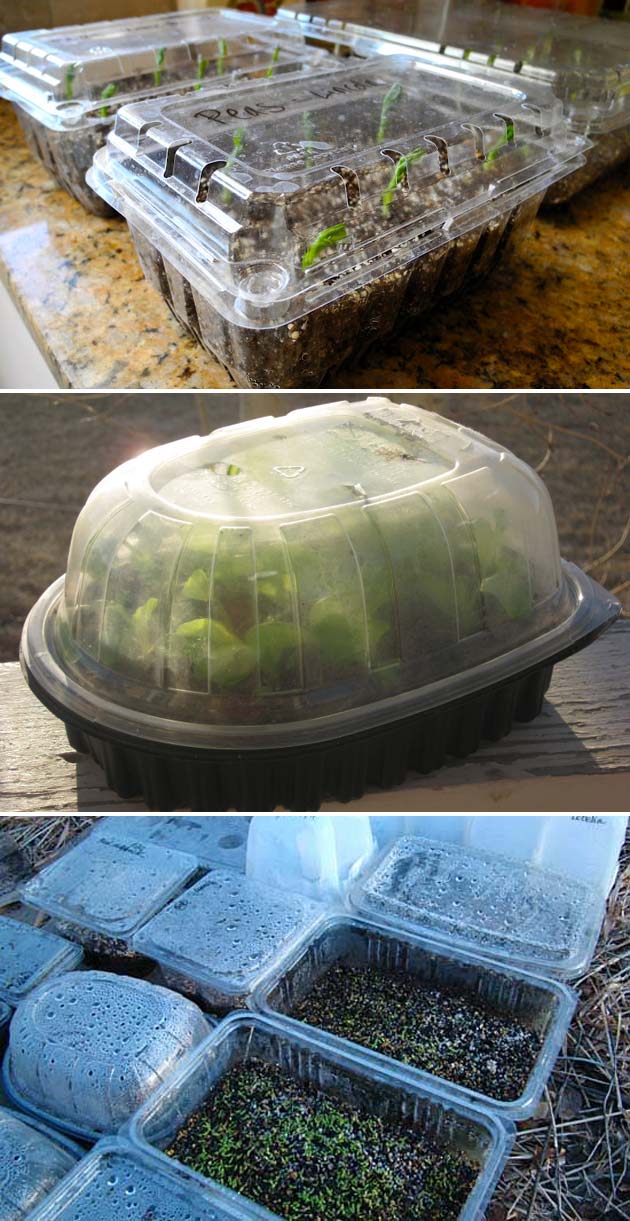
Old food containers, clear takeout boxes, or plastic cake boxes can be transformed into mini greenhouses. Their transparent lids help retain moisture and heat, creating the perfect environment for germination. Just be sure to poke a few drainage holes in the bottom to prevent water from pooling.
2. Make Newspaper Seed-Starter Pots
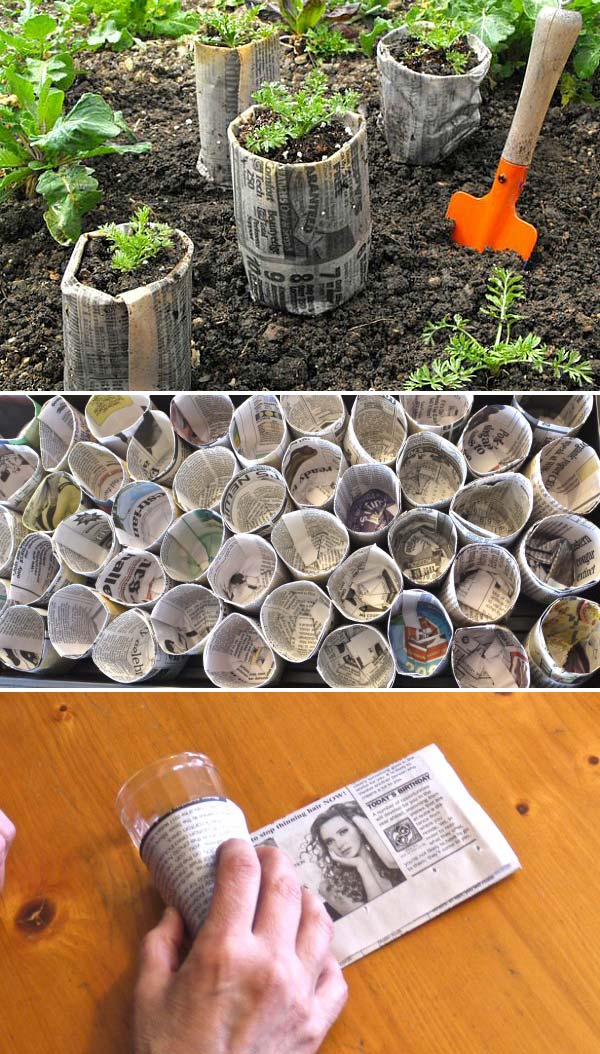
Newspaper is biodegradable, making it an excellent choice for seed-starting pots. Simply roll strips of newspaper into small cylinders, fold the bottom to create a base, and lightly moisten the paper to hold its shape. Once seedlings are ready for transplanting, you can plant the entire paper pot directly into the soil, reducing root disturbance.
3. Convert K-Cups into Starter Pots for Spring Planting
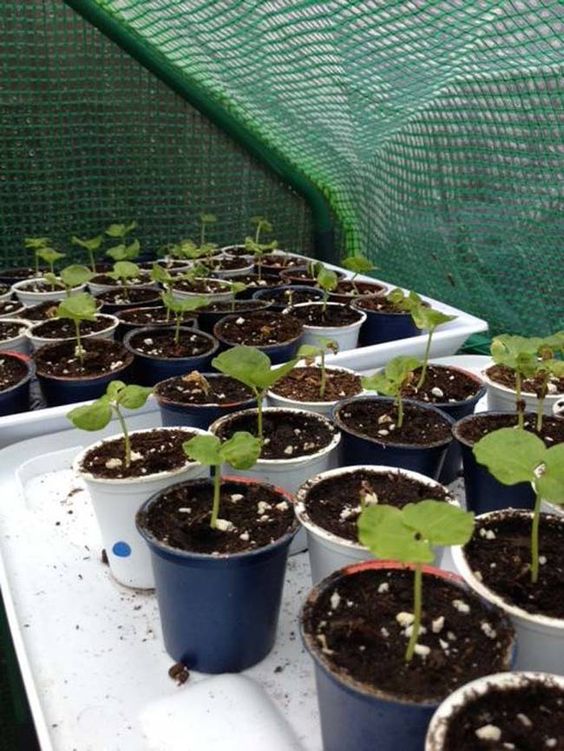
Used K-Cups are the perfect size for starting seeds. After cleaning out the coffee grounds, poke a small drainage hole in the bottom and fill them with seed-starting mix. These mini pots are sturdy, reusable, and an excellent way to repurpose single-use plastic.
4. Use Toilet Paper Rolls to Start Your Plants
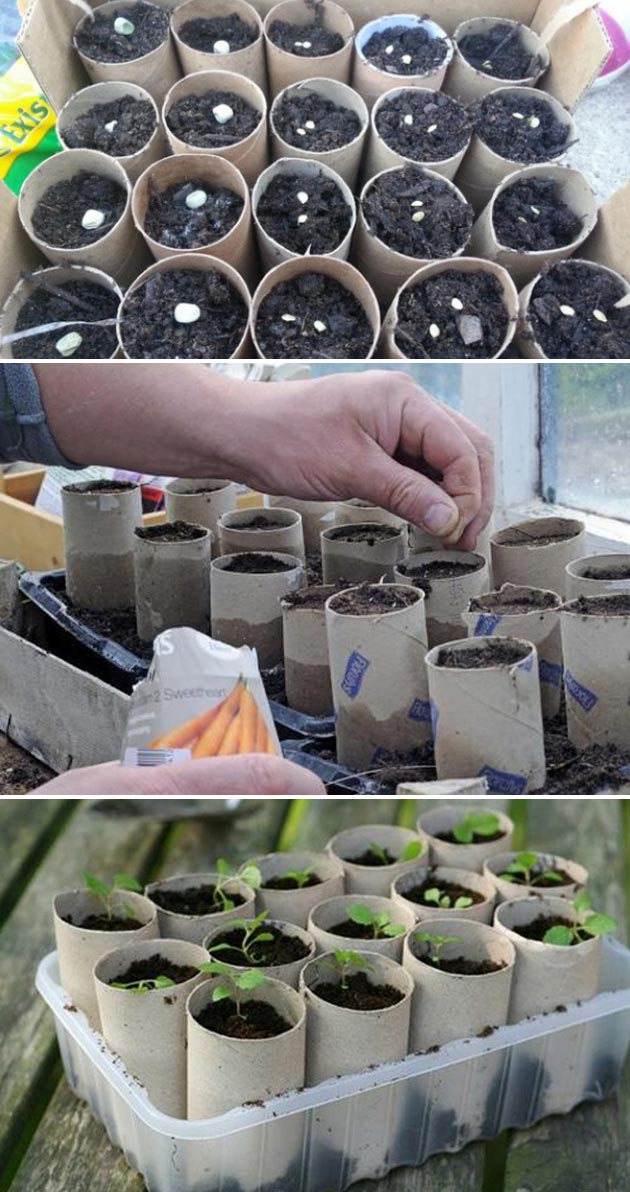
Toilet paper rolls can be cut in half and stood upright to create biodegradable seed-starting pots. Their cardboard material holds moisture well and naturally breaks down in the soil when transplanted. Simply place them in a tray, fill them with soil, and plant your seeds.
5. Repurpose a Loofah Sponge as a Seed Starter
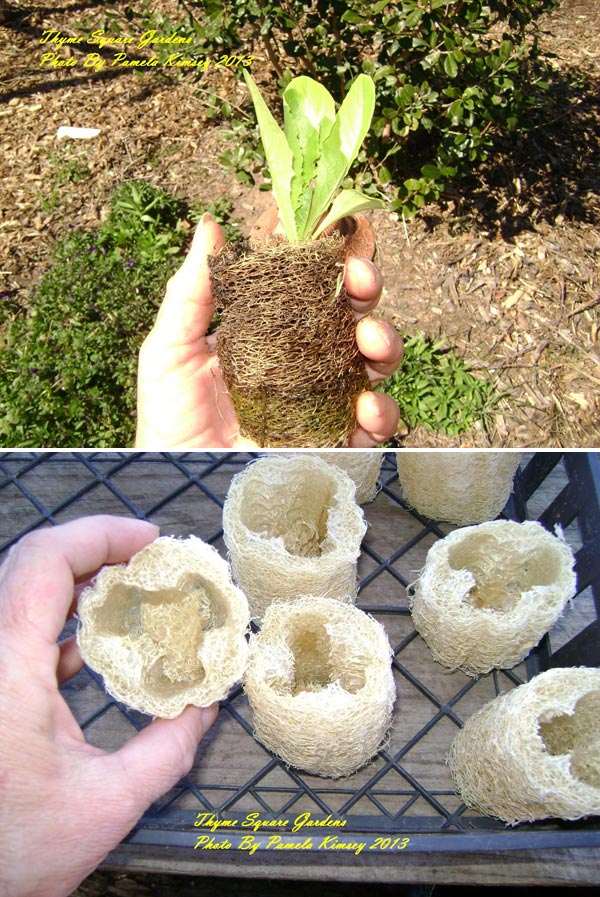
A natural loofah sponge can serve as a unique seed-starting medium. Cut the loofah into sections and press soil into the cavities to create a breathable, well-draining environment for seeds to germinate. The sponge’s porous structure promotes airflow and moisture retention, ideal for healthy root development.
6. Plant the Entire Egg Carton into the Ground
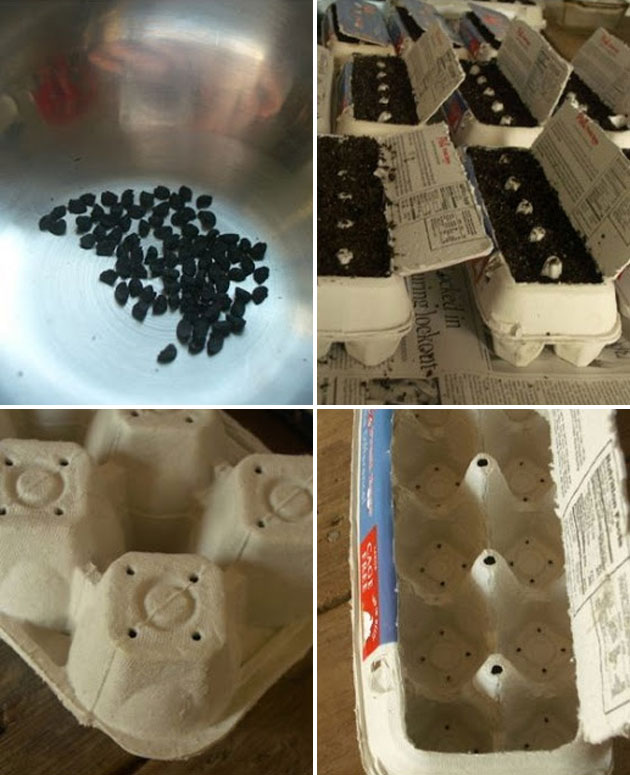
Cardboard egg cartons are another biodegradable seed-starting option. Fill each compartment with soil and plant your seeds. When the seedlings are ready, cut the carton into individual sections and plant them directly in the ground. The carton will break down naturally while protecting the young roots.
7. Turn an Old Ice Cube Tray into a Seed Starter
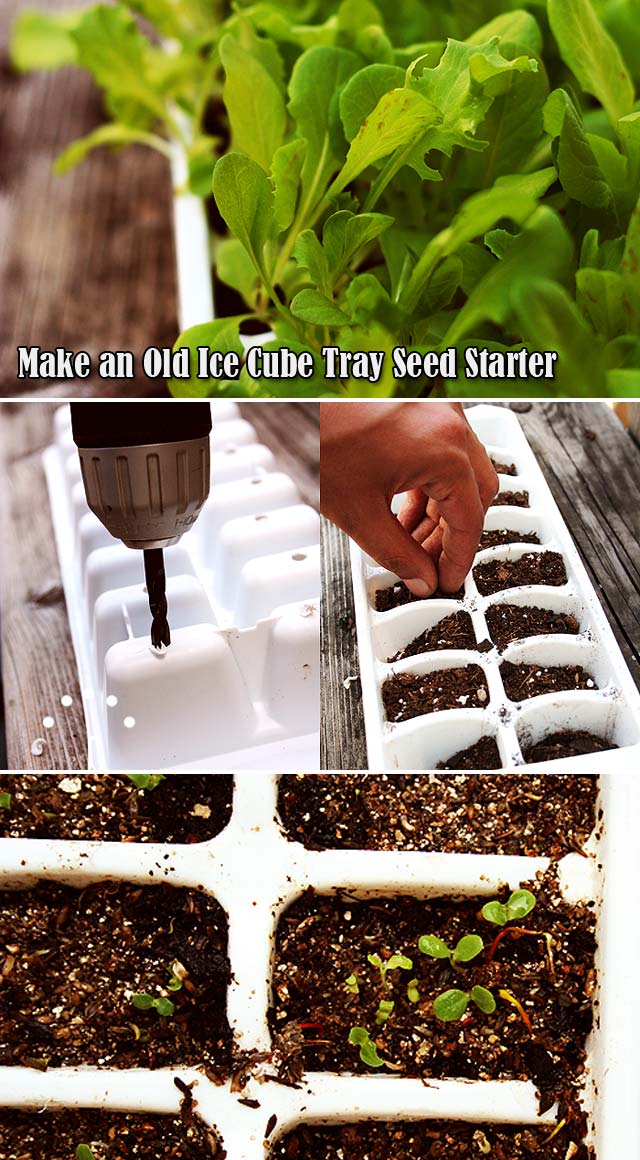
If you have an old or unused ice cube tray, repurpose it for seed starting. Each compartment is the perfect size for early germination. Just ensure the tray has proper drainage by drilling small holes in the bottom.
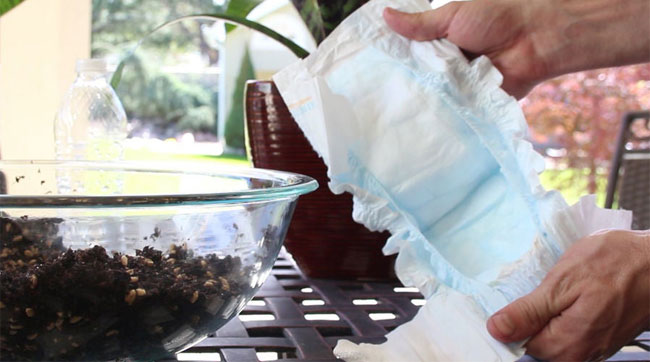
8. Recycle Worn-Out Paper to Make Paper Pulp Seed Starters
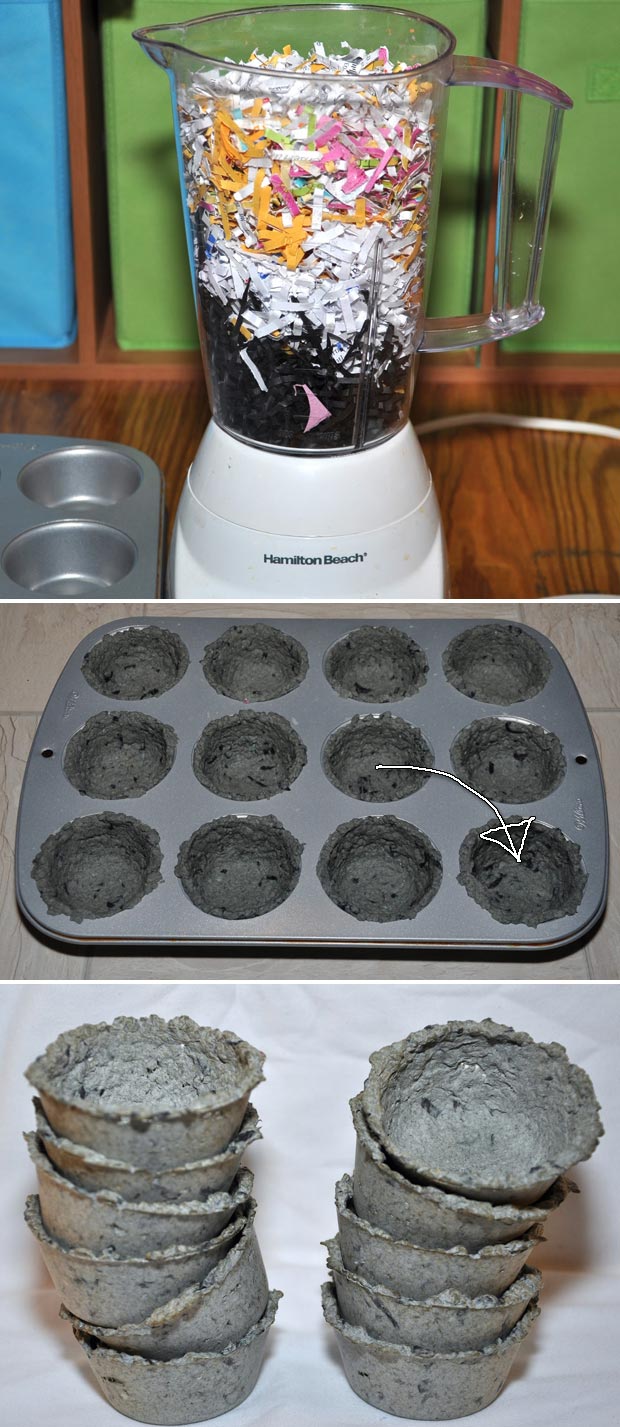
Instead of discarding old paper, blend it with water to create a thick pulp. Mold this mixture into small pots and let them dry completely before use. These DIY paper pulp pots are biodegradable, making transplanting easy and eco-friendly.
9. Sow in Gallon Bags Instead of Jugs
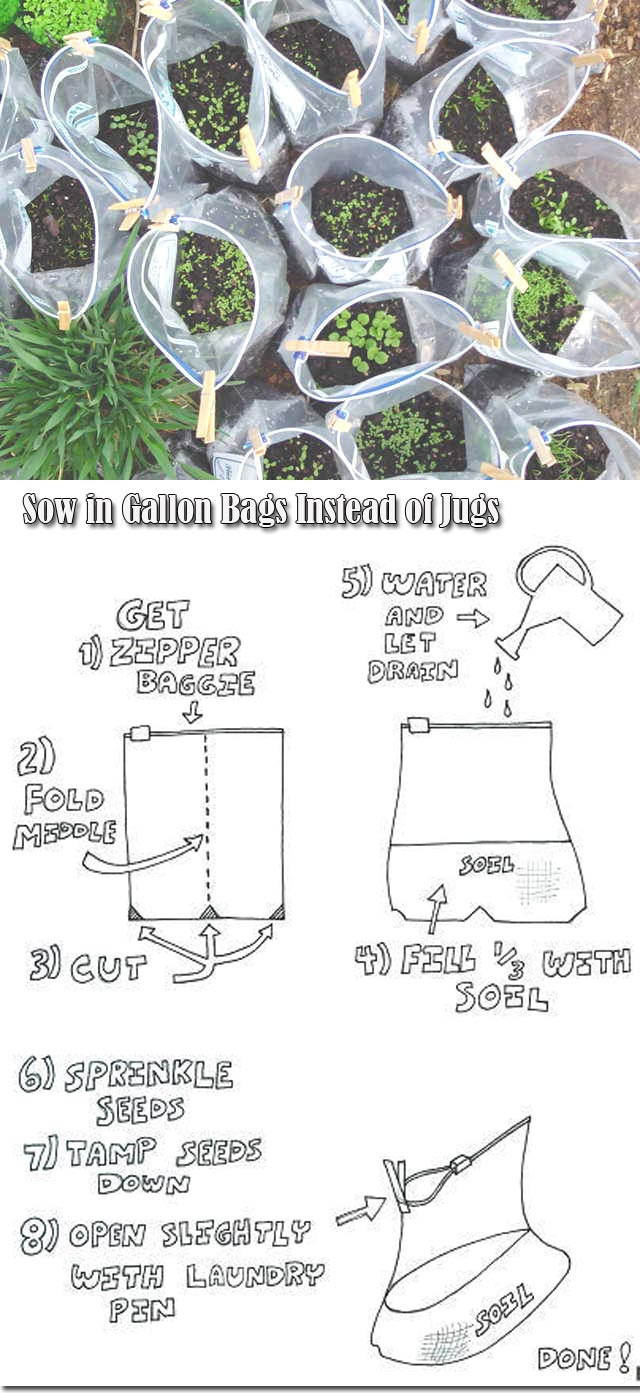
Rather than using plastic jugs, try sowing seeds in gallon-sized plastic bags. Fill them with seed-starting mix, poke a few drainage holes, and seal the bag to retain moisture. This method creates a self-contained growing environment similar to a greenhouse.
10. Use a Milk Jug as a Seed-Starting Container
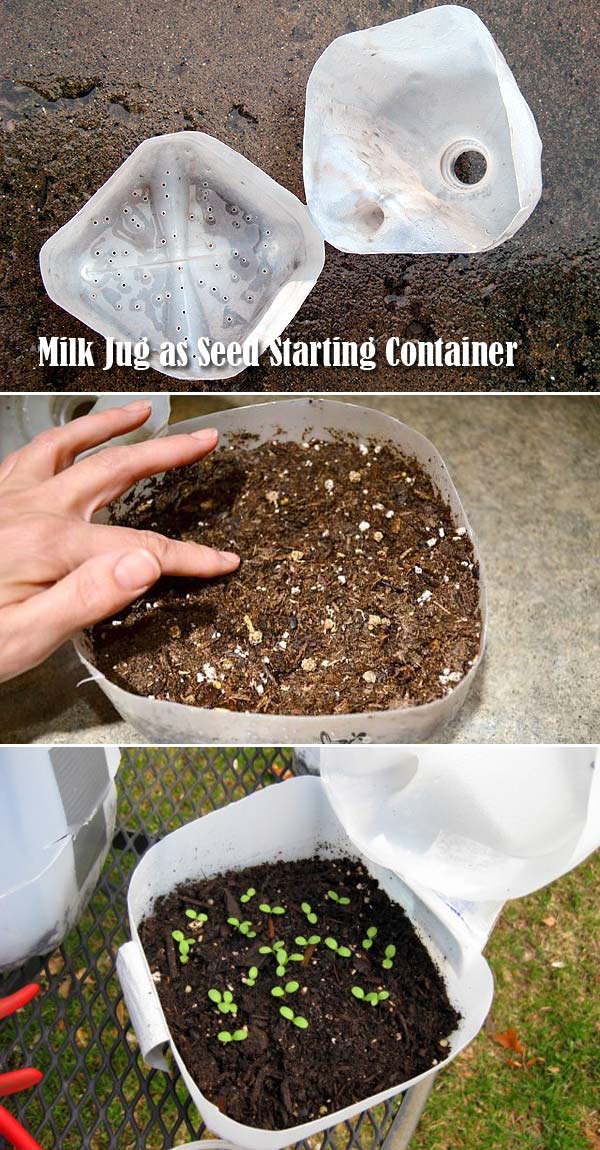
A milk jug can be cut in half and used as a mini greenhouse for seed starting. The top half helps trap heat and humidity, while the bottom serves as a deep planting tray. This method is perfect for early-season sowing, especially in colder climates.
By repurposing everyday items, you can create a sustainable, cost-effective, and fun seed-starting system. Experiment with these DIY methods and enjoy watching your seedlings thrive while reducing waste in the process. Happy gardening! 🌱
2). DIY Seed Trays and Soil Blocks:
Creative and Sustainable Alternatives
Using seed trays and soil blocks is an excellent way to start your seeds efficiently while minimizing waste. These alternatives help seedlings develop strong root systems and make transplanting easier. Here are some innovative ways to create DIY seed trays and soil blocks at home.
1. Use a Soil Blocker to Create Compact Seed Containers

A soil blocker is a handy tool that compresses seed-starting mix into uniform blocks, eliminating the need for plastic pots. These soil blocks provide excellent aeration, prevent root disturbance, and encourage strong root development. Simply moisten your seed-starting mix, press it into the soil blocker, and eject the neatly shaped blocks onto a tray.
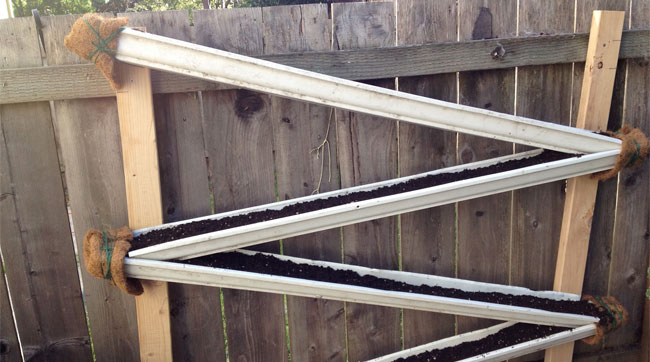
2. Make a DIY Soil Blocker with PVC Pipe and Wooden Plugs
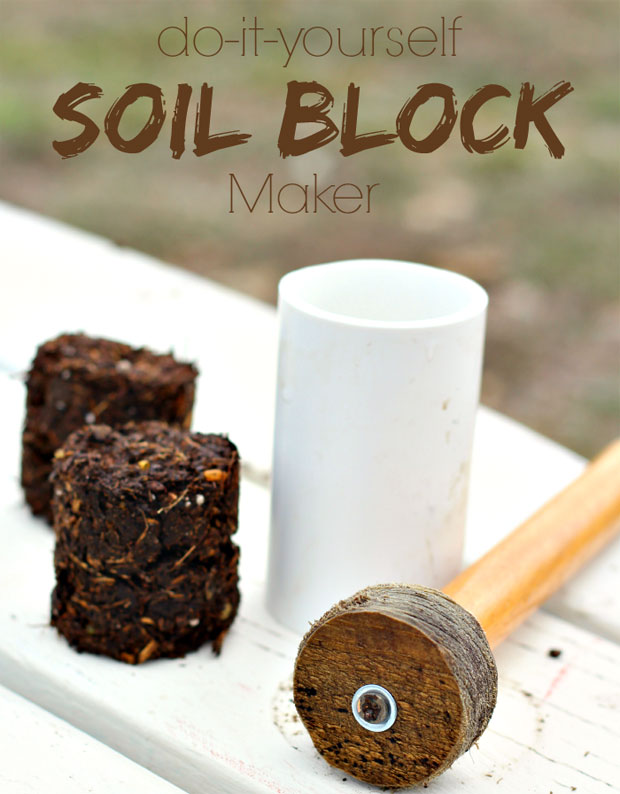
If you don’t have a commercial soil blocker, you can create one using PVC pipe and wooden plugs. Cut the PVC pipe into short sections and attach a wooden plug to one end to form a sturdy mold. Press the filled pipes into moist soil mix and release the compact blocks onto a tray.
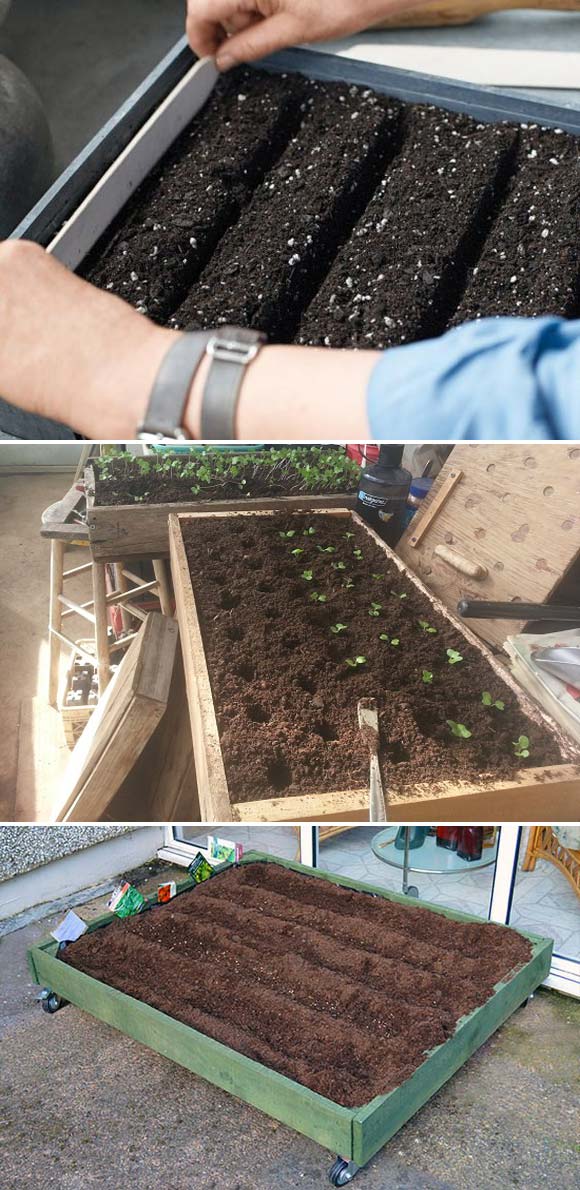
3. Recycle a Plastic Container to Create Soil Blocks
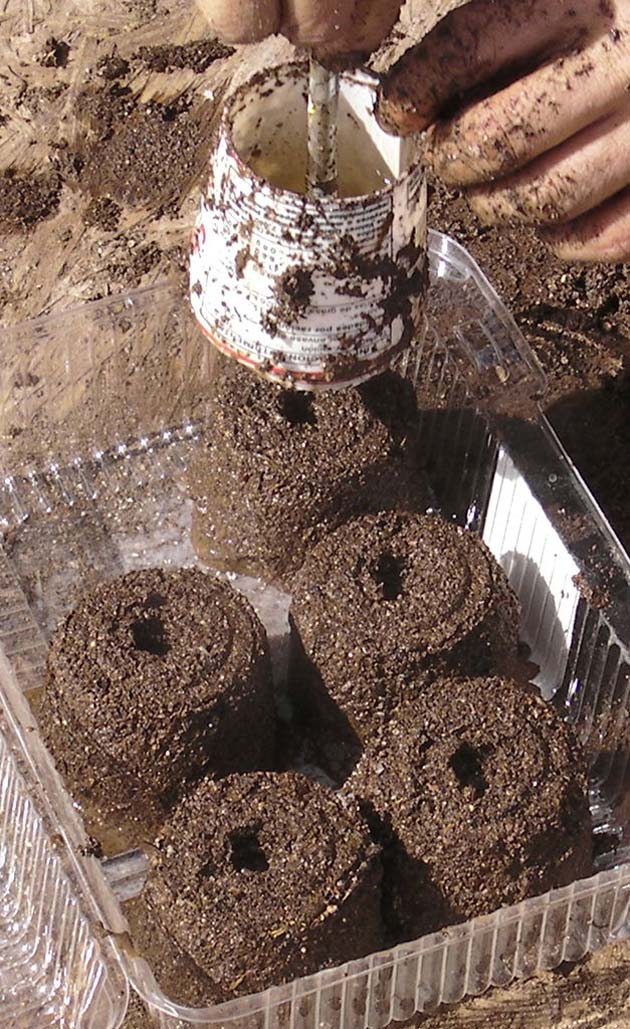
Repurpose an old plastic container by turning it into a soil block mold. Cut out sections or press divots into the soil mix to form individual planting spaces. This DIY solution is a great way to recycle while providing a structured planting medium for your seeds.
4. Use Baking Tins as Templates for Square Foot Gardening
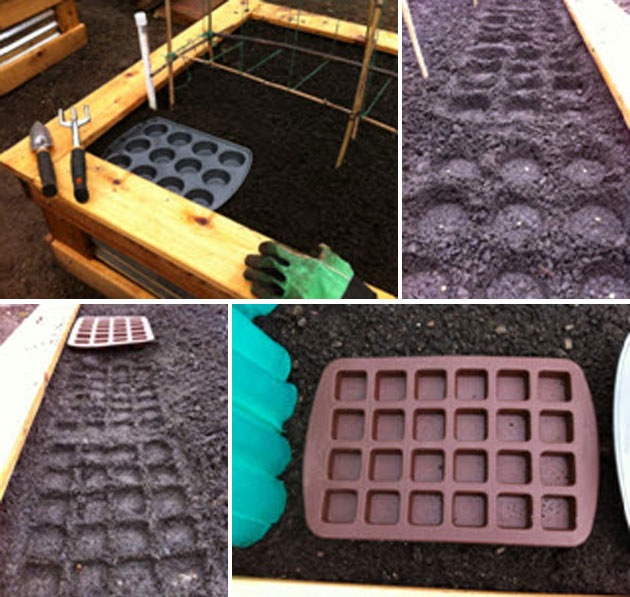
Baking tins can serve as an excellent tool for shaping soil blocks in a square foot gardening layout. Fill the tin with soil mix, press firmly, and then lift it to reveal evenly spaced planting areas. This method helps organize your garden efficiently while maximizing space usage.
5. Make a Seed-Starting Tray from Cardboard and Coffee Filters
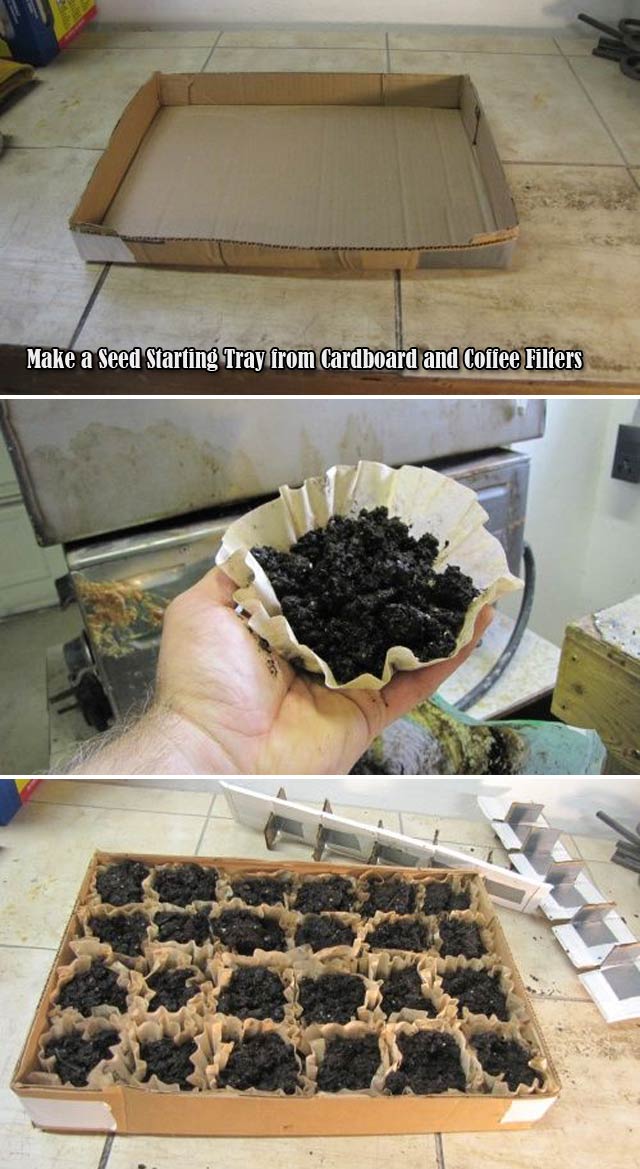
Cardboard trays lined with coffee filters create an eco-friendly and biodegradable seed-starting system. The coffee filters allow water drainage while keeping soil contained. You can also use inserts from wine cases as dividers within the tray, keeping different seed varieties organized.

6. Build Reusable Wooden Flats for Seedlings
For a long-lasting and sustainable option, construct wooden flats to hold soil and seedlings. These wooden trays can be reused season after season, reducing plastic waste while providing a sturdy growing space for young plants. Ensure the design allows for proper drainage to maintain optimal moisture levels.
By utilizing these DIY methods, you can create effective and sustainable seed-starting systems that benefit both your plants and the environment. Choose the method that best suits your needs and enjoy a productive gardening season! 🌱
3. Make Tags and Labels
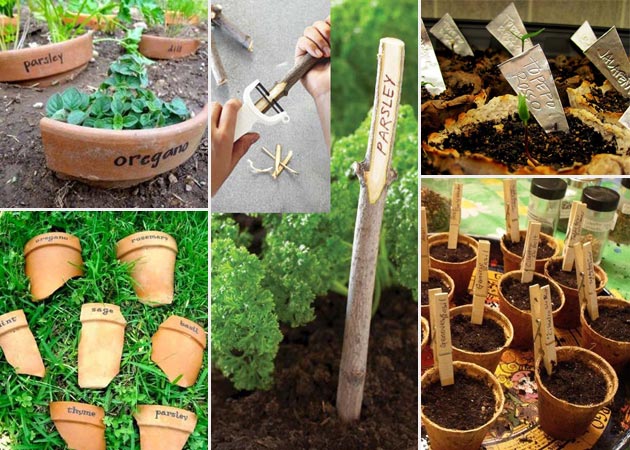
Labeling your seedlings is essential for tracking their progress.
-
Use waterproof markers and plant tags.
-
Masking tape and a Sharpie can work well for DIY containers.
-
If using a grid-style seed tray, label the cells like a spreadsheet for easy identification.

4. Use the Right Seed Starting Mix
Avoid regular garden soil—it compacts easily and may contain pathogens. Instead, use a light and airy Seed Starting Mix.
How to Prepare the Mix:
-
If using store-bought mix, choose organic and additive-free options.
-
To DIY, combine peat moss, vermiculite, and perlite for a well-draining mix.
-
Hydrate the mix before planting—squeeze a handful; it should hold together but not drip water.
Homemade Seed Sowing Mix Recipe:
Coco coir (from the husks of coconuts); Vermiculite (help to retain water); Perlite (prevent soil from compacting); Fine chicken grit; Coarse sand; Compost(such as leaf mold or other soil) need to be sterilized in a microwave roasting bag for 10 minutes(82 °C).
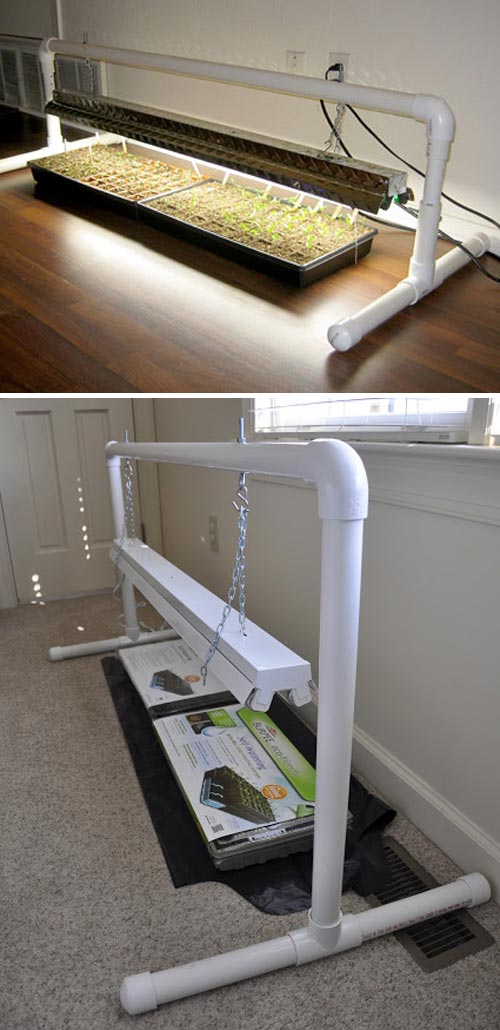
5. Provide Proper Lighting
-
Use fluorescent grow lights or LED grow lamps for consistent lighting.
-
Some seeds require darkness to germinate—always check the packet.
-
Keep lights 2-4 inches above seedlings and adjust as they grow.
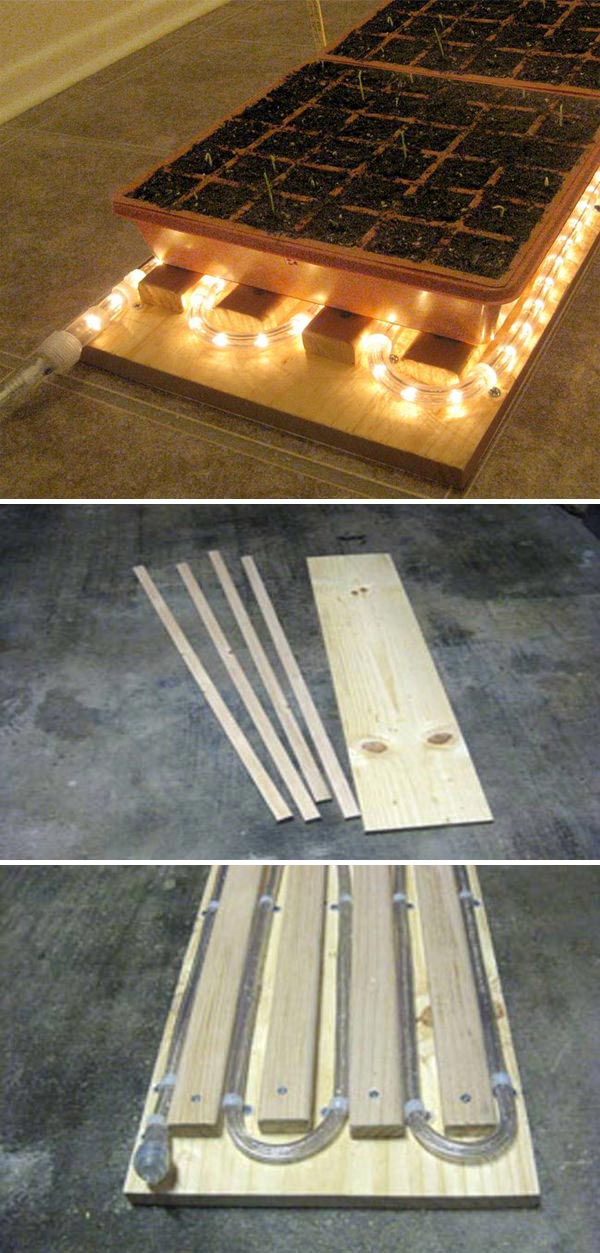
6. Maintain Warmth with a Heat Mat or Mini Greenhouse
DIY Heat Mat Speeds Seed Starting:
-
Place seed trays on a heat mat to speed up germination.
-
If growing outdoors, cover with plastic domes, bags, or a DIY greenhouse.
If you are starting seeds outdoors, you can keep them warm by setting up a greenhouse or covering them with plastic bags or films. Check out 17 Simple Budget-Friendly Plans to Build a Greenhouse
7. Keep Soil Moist, But Not Too Wet
-
Use a spray bottle to mist water gently.
-
Consider bottom watering by placing trays in a shallow water bath.
-
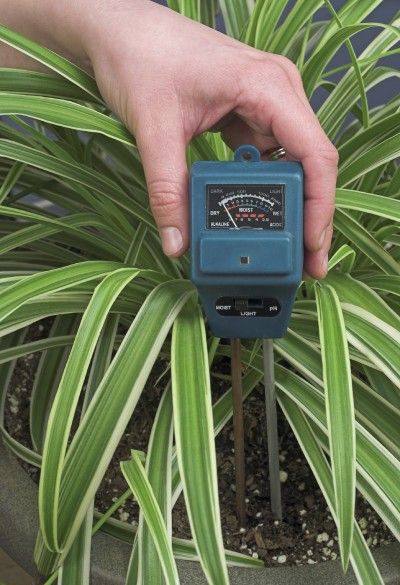
A moisture meter can help maintain optimal soil moisture levels.
8. Transplanting Outdoors
Once seedlings are strong enough, they need to be hardened off before transplanting.
-
Gradually expose them to outdoor conditions over 7-10 days.
-
Start with 2 hours per day in a shaded area, increasing exposure gradually.
-
Ensure soil and weather conditions are suitable before moving them permanently.
9. The Final Step: Ongoing Care
Your plant babies need attention! Keep an eye on:
-
Watering – Keep the soil moist but avoid overwatering.
-
Weather Conditions – Protect young plants from extreme cold or heat.
-
Pests – Watch for insects and use organic deterrents if needed.
Let’s Start Sowing!
Now that you have a solid foundation for seed starting, it’s time to put your knowledge into action. Follow these steps, and soon you’ll have a thriving garden full of healthy, homegrown plants. Happy gardening! 🌱✨