A Beginner’s Guide to Growing Mushrooms at Home
Growing your own food at home is not just a rewarding endeavor, it’s also a great way to ensure you have access to fresh, healthy, and nutrient-packed produce. While many people are familiar with growing vegetables and herbs, mushrooms offer a unique opportunity to expand your gardening skills.
These flavorful fungi are a powerhouse of health benefits and can be grown in the comfort of your own home. However, growing mushrooms is a bit different from cultivating other plants, and it requires a specific environment to thrive. The good news is, with the right guidance, anyone can successfully grow mushrooms at home. Whether you are a seasoned gardener or a first-time grower, this guide will walk you through everything you need to know to get started on your mushroom-growing adventure.
1. Choosing the Right Mushroom Variety for Your Home Garden
Introduction: One of the first challenges when growing mushrooms at home is selecting the right variety. Unlike common garden vegetables, mushrooms require a specific environment to thrive. However, the diversity of mushrooms you can grow is vast—there are several species that are well-suited for home cultivation.
From the earthy richness of shiitake to the delicate flavor of oyster mushrooms, the possibilities are plentiful. Understanding your space, climate, and the time you can dedicate to mushroom care will help you choose the best type for your needs.
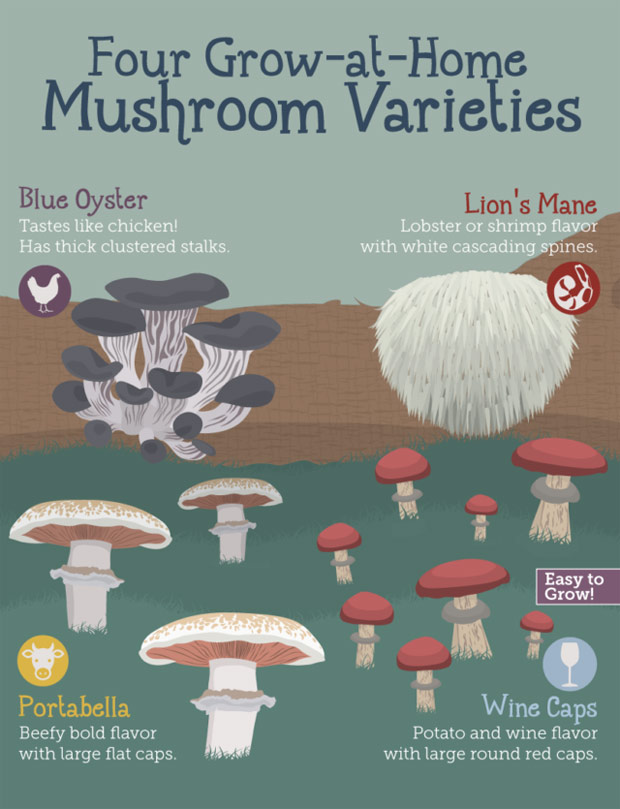
Popular mushroom varieties for home cultivation include:
-
Oyster Mushrooms: Fast-growing and beginner-friendly, ideal for those just starting.
-
Shiitake Mushrooms: Slightly more involved to grow but yield a meaty, umami flavor.
-
Button Mushrooms (Agaricus bisporus): The classic white mushroom, great for indoor growing.
-
Lion’s Mane Mushrooms: Known for their unique appearance and cognitive health benefits.
-
Maitake Mushrooms: Also called “Hen of the Woods,” these are excellent for cooler climates.
Each variety has its own growth requirements, so choose one that aligns with your space and skill level. Check more information at: Fix.com
2. 5 Simple Steps to Grow Your Own Mushrooms: DIY Starter Kit
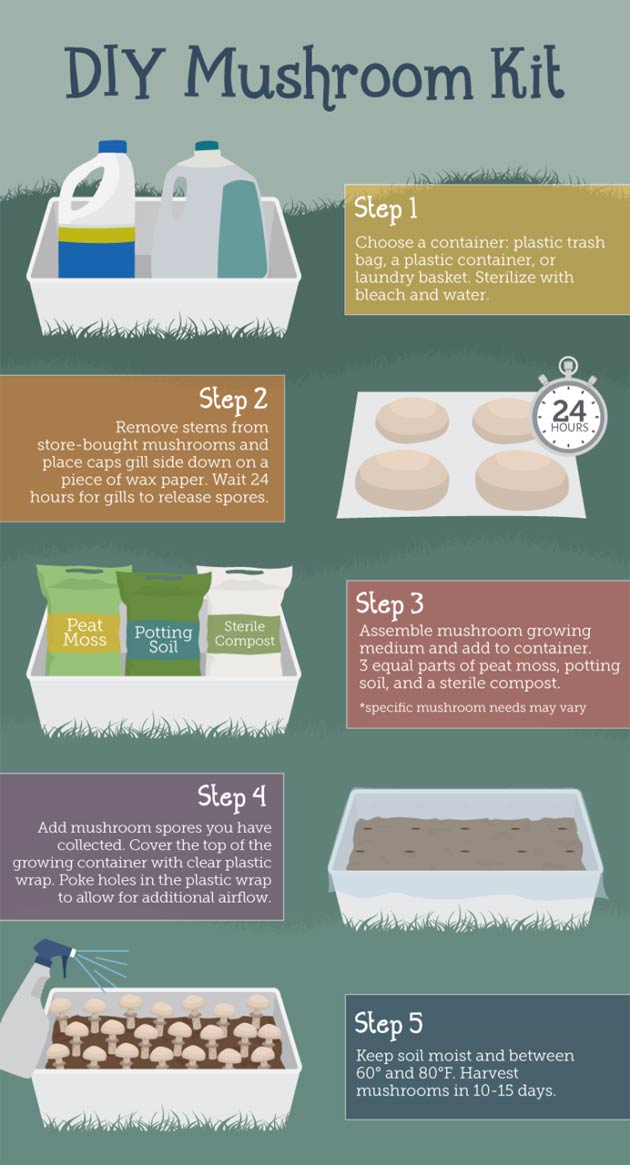
Introduction: Starting your mushroom-growing journey can feel overwhelming at first, but creating a DIY starter kit will make the process easier and more manageable. In just five steps, you can set up your own mushroom-growing environment with simple, inexpensive materials like plastic containers, bags, and even a laundry basket. This guide will walk you through the essentials of setting up your first mushroom garden.
How-To:
-
Step 1: Select the Ideal Growing Container
Choosing the right container is essential for creating an optimal environment for your mushrooms. While a laundry basket or a trash can can work well, the key is to ensure that the container has adequate space and airflow for the mushrooms to grow. Before using any container, sterilize it thoroughly with a bleach and water solution to eliminate any potential contaminants that could hinder the growth of your mushrooms. This step is crucial for ensuring a healthy and productive growing environment.
-
Step 2: Prepare Mushroom Spores from Store-Bought Mushrooms
The next step is harvesting spores from mature mushrooms, which will act as the seeds for your new crop. Start by taking store-bought mushrooms and carefully removing the stems. Place the caps, gills facing down, on a piece of wax paper. Allow them to sit undisturbed for 24 hours. During this time, the mushroom gills will release spores onto the paper, which you will use to inoculate your growing medium. This process is simple but vital for collecting fresh, viable spores that will give your mushrooms the best start.
-
Step 3: Prepare the Mushroom Growing Medium
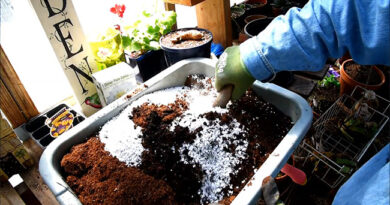
The growing medium provides the nutrients your mushrooms need to thrive. In a clean container, mix 3 parts peat moss, 3 parts potting soil, and 1 part sterile compost. This balanced mix creates a fertile, well-draining medium that mushrooms love. Peat moss retains moisture, potting soil provides structure, and compost adds essential nutrients to fuel the growth of your mushrooms. Once your mixture is ready, add it to the container you prepared earlier, ensuring it is evenly distributed and firmed down slightly to create a stable growing environment.
-
Step 4: Inoculate the Medium with Spores
Now that your growing medium is prepared, it’s time to introduce the spores into the mix. Sprinkle the spores you’ve collected evenly across the surface of the growing medium. Gently mix them into the top layer of the soil, ensuring good contact between the spores and the substrate. To maintain a stable and moist environment, cover the container with clear plastic wrap. This creates a mini greenhouse effect, allowing for air circulation while maintaining humidity—two crucial factors for mushroom growth.
-
Step 5: Maintain Ideal Conditions and Harvest
Mushrooms need a warm, moist environment to flourish. Keep the container in a location where the temperature remains between 60-80°F (15-27°C), which is the ideal range for most common mushroom varieties. Moisture is equally important, so ensure the growing medium stays consistently damp but not waterlogged. After about 10-15 days, you should begin to see small mushrooms emerging from the soil. Harvest them carefully when they reach maturity, cutting them at the base of the stem. Enjoy your homegrown mushrooms, and repeat the process for a fresh crop!
With these simple steps, you can start cultivating mushrooms with ease. A guide developed by Fix.com.
3. We have found some useful ways to grow your own mushrooms at home, check them:
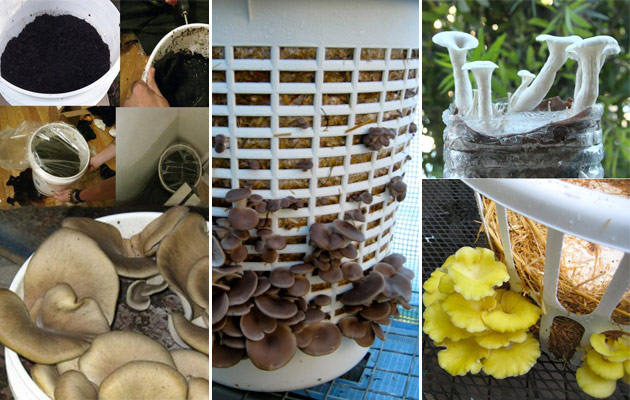
#1. Growing Mushrooms in a Laundry Basket: A Unique, Space-Saving Method
Introduction: If you’re looking for a space-efficient and practical way to grow mushrooms indoors, using a laundry basket can be an innovative solution. This method allows for optimal air circulation and moisture retention, creating a perfect environment for your mushrooms to flourish. Plus, it’s a cost-effective approach with minimal setup required.
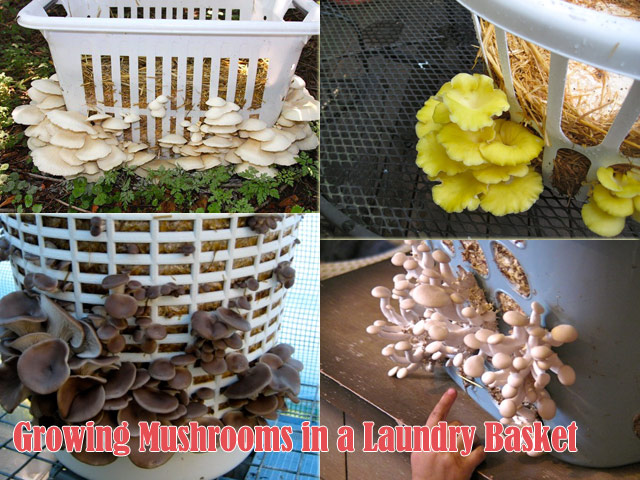
How-To: Start by lining the laundry basket with a layer of plastic or burlap to retain moisture. Fill it with a pasteurized growing medium, such as straw, coffee grounds, or sawdust. Inoculate the medium with your mushroom spawn and place the basket in a dark, cool location.
Keep the basket moist by spraying it lightly with water, and ensure it remains in a temperature range that suits the mushroom variety you’ve chosen. As the mushrooms begin to grow, you’ll be able to harvest them in just a few weeks. See the detailed instruction at here.
#2 How to Grow Mushrooms on Logs: A Natural Approach to Cultivation
Introduction: Growing mushrooms on logs is one of the most traditional and natural methods of mushroom cultivation. This approach mimics the way mushrooms grow in the wild, where they thrive on decomposing wood. It’s perfect for outdoor growers or those with a bit more space, as logs can be placed in shaded, moist areas.
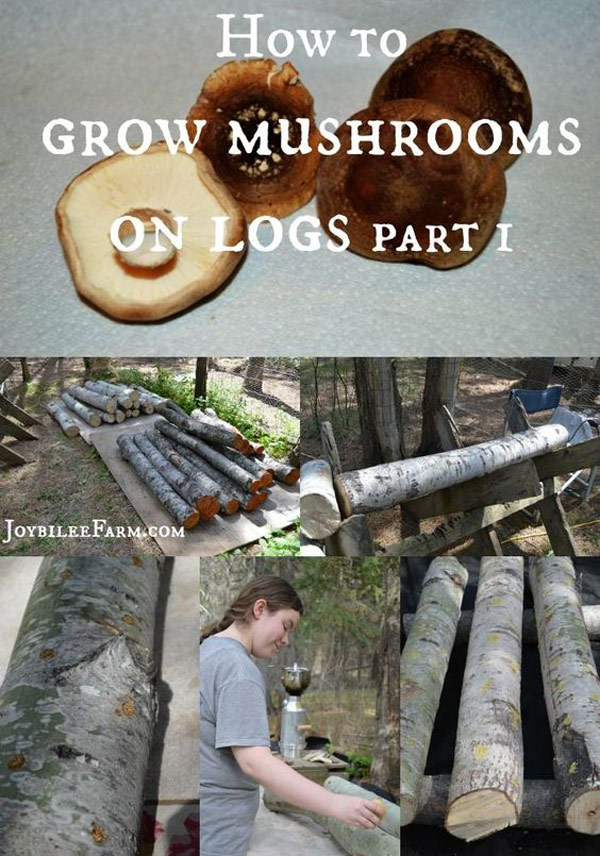
How-To: To start, select a hardwood log such as oak, maple, or beech. Drill holes into the log and fill them with mushroom spawn, then seal the holes with wax to prevent contamination.
Place the inoculated logs in a cool, shaded area and keep them moist. Over time, the mycelium will colonize the wood, and mushrooms will begin to fruit. This process can take several months, but the reward is fresh, homegrown mushrooms directly from nature. Check the full tutorial for above project at here. Check video tutorial below:
#3 Growing Mushrooms in Coffee Grounds: Recycle Your Way to Fresh Fungi
Introduction: Coffee grounds are a sustainable and effective substrate for growing mushrooms. They are rich in nitrogen, making them an ideal environment for certain mushroom varieties, such as oyster mushrooms. This method is easy, eco-friendly, and a great way to recycle your daily coffee grounds into a productive gardening resource.
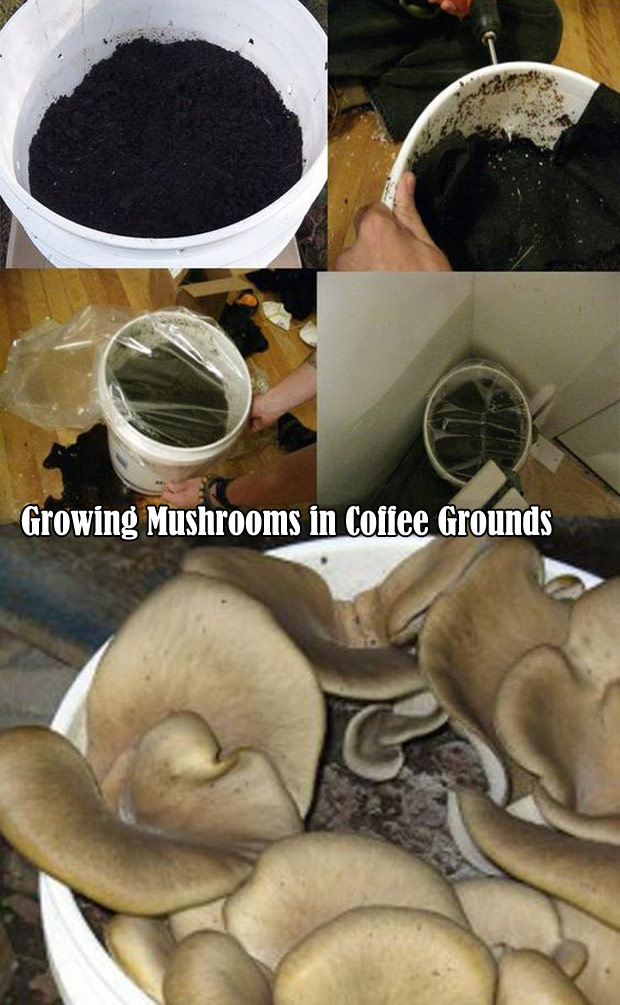
How-To: Collect used coffee grounds and pasteurize them by heating to kill off any harmful microorganisms. Mix the grounds with mushroom spawn, then place the mixture in a plastic bag or container.
Store the container in a dark, cool place, and water the grounds regularly to keep them moist. Once the mushrooms begin to appear, they will be ready to harvest in as little as a few weeks. Not only will you have fresh mushrooms, but you’re also reducing waste by reusing coffee grounds. For more information visit here.
#4. Using Commercial Mushroom Kits for Effortless Cultivation
Introduction: For those who prefer a hands-off approach to mushroom cultivation, commercial mushroom kits offer a straightforward solution. These kits come with everything you need, including pre-inoculated substrate and easy-to-follow instructions, making them perfect for beginners.
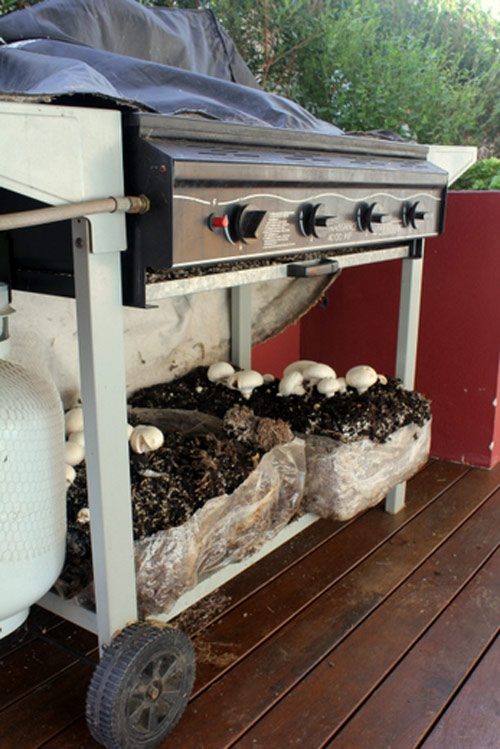
How-To: Simply purchase a commercial mushroom kit, which typically includes a bag or container filled with growing medium already inoculated with mushroom spores.
Place the kit in a cool, dark area and follow the provided instructions for watering and maintenance. Most kits will yield mushrooms in just a few weeks, and they require minimal effort after the initial setup. See the instruction here.
#5. Growing Oyster Mushrooms in Coffee Grounds and Cardboard: A Simple, Effective Method
Introduction: Combining two of the most accessible materials—coffee grounds and cardboard—this method allows you to grow oyster mushrooms with minimal cost and effort. It’s perfect for small-scale mushroom growing and ideal for those looking to start with something simple.
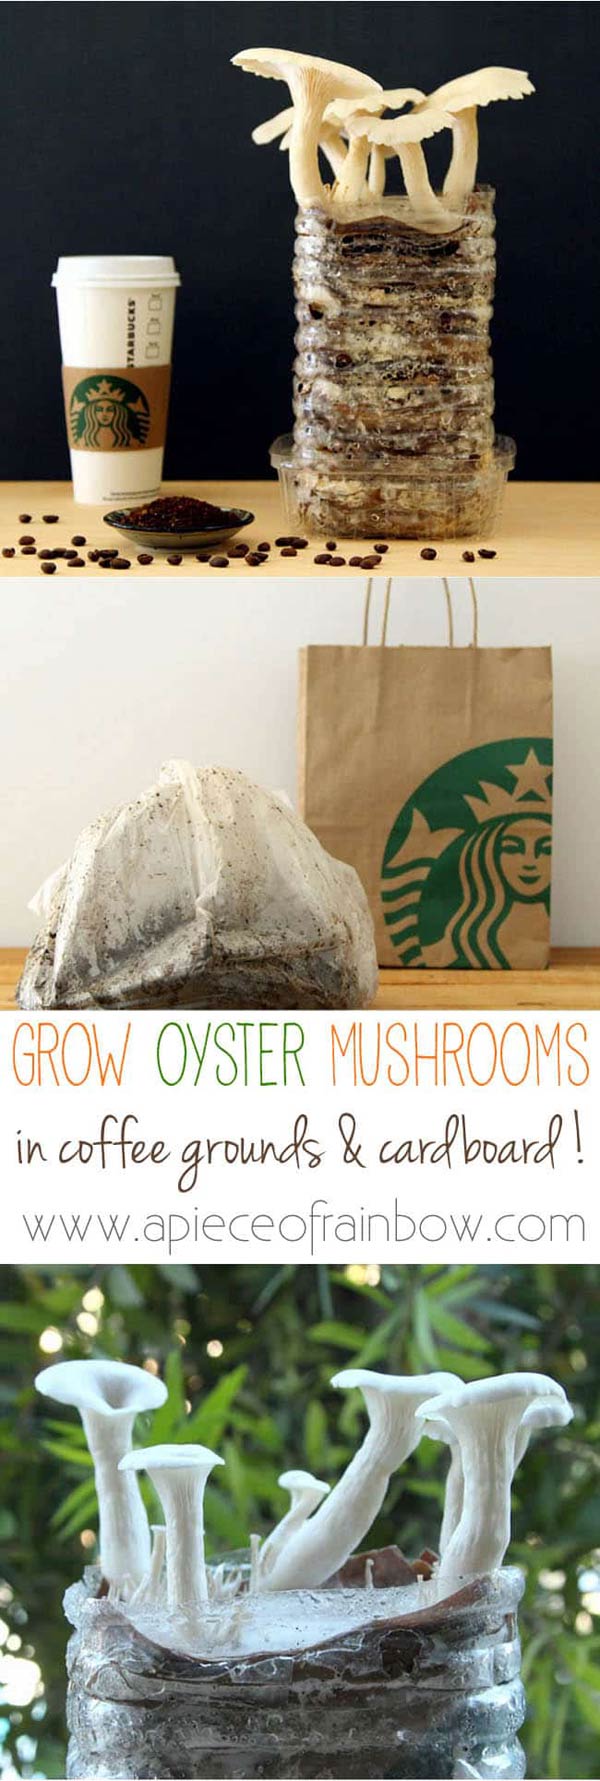
This method come from A Piece of Rainbow . This simple method requires no sterilization.
Below is a video of how fast they grew in just 4 days!

